 CrewCo
Docs
Everything you need to run tasks through a team of agents, from the browser, the terminal, or inside the CLI you already use.
Overview
CrewCo takes one task and hands it to a crew: a Team Lead that scopes the work with you, a Developer, a Tester, a Code Reviewer, and an opt-in UI/UX Designer. Each role runs on the CLI, model and reasoning effort you choose, across Claude Code, Codex CLI, GitHub Copilot CLI and Antigravity (agy).
CrewCo drives the CLIs you already have installed and logged in. It never calls a model API itself and never needs a separate model account. Everything runs on your machine.
There are three ways to use it, and they share the same files on disk, so you can switch between them:
| Way | Best for | Start with |
|---|---|---|
| Web UI | A task board, live progress, and clicking through scoping and approvals. | crewco ui |
| Terminal | Scripts, remote machines, and running a task without a browser. | crewco run "…" |
| Plugin | Staying inside Claude Code, Codex, Copilot CLI or Antigravity. | /crewco:new-task |
How a task moves
- Scope. You describe the task. The Team Lead asks what is missing and writes acceptance criteria.
- Confirm the lineup. You choose the CLI, model and effort for each role.
- Fix rounds. The Developer builds, the Tester checks the criteria, the Reviewer reads the diff. Findings go back to the Developer, for up to three rounds by default.
- Commit. You approve the commit. Work happens in an isolated git worktree by default, so your checkout stays untouched until you merge.
Install
You need Node.js 20 or newer, and at least one of Claude Code, Codex CLI, Copilot CLI or Antigravity installed and logged in. Run CrewCo without installing anything:
npx crewco ui
or install it globally:
npm i -g crewco
First run
Run crewco ui. It opens a local page at http://127.0.0.1:4287 (change the port with --port, or add --no-open to skip opening the browser). The first time, you land on a short setup wizard.
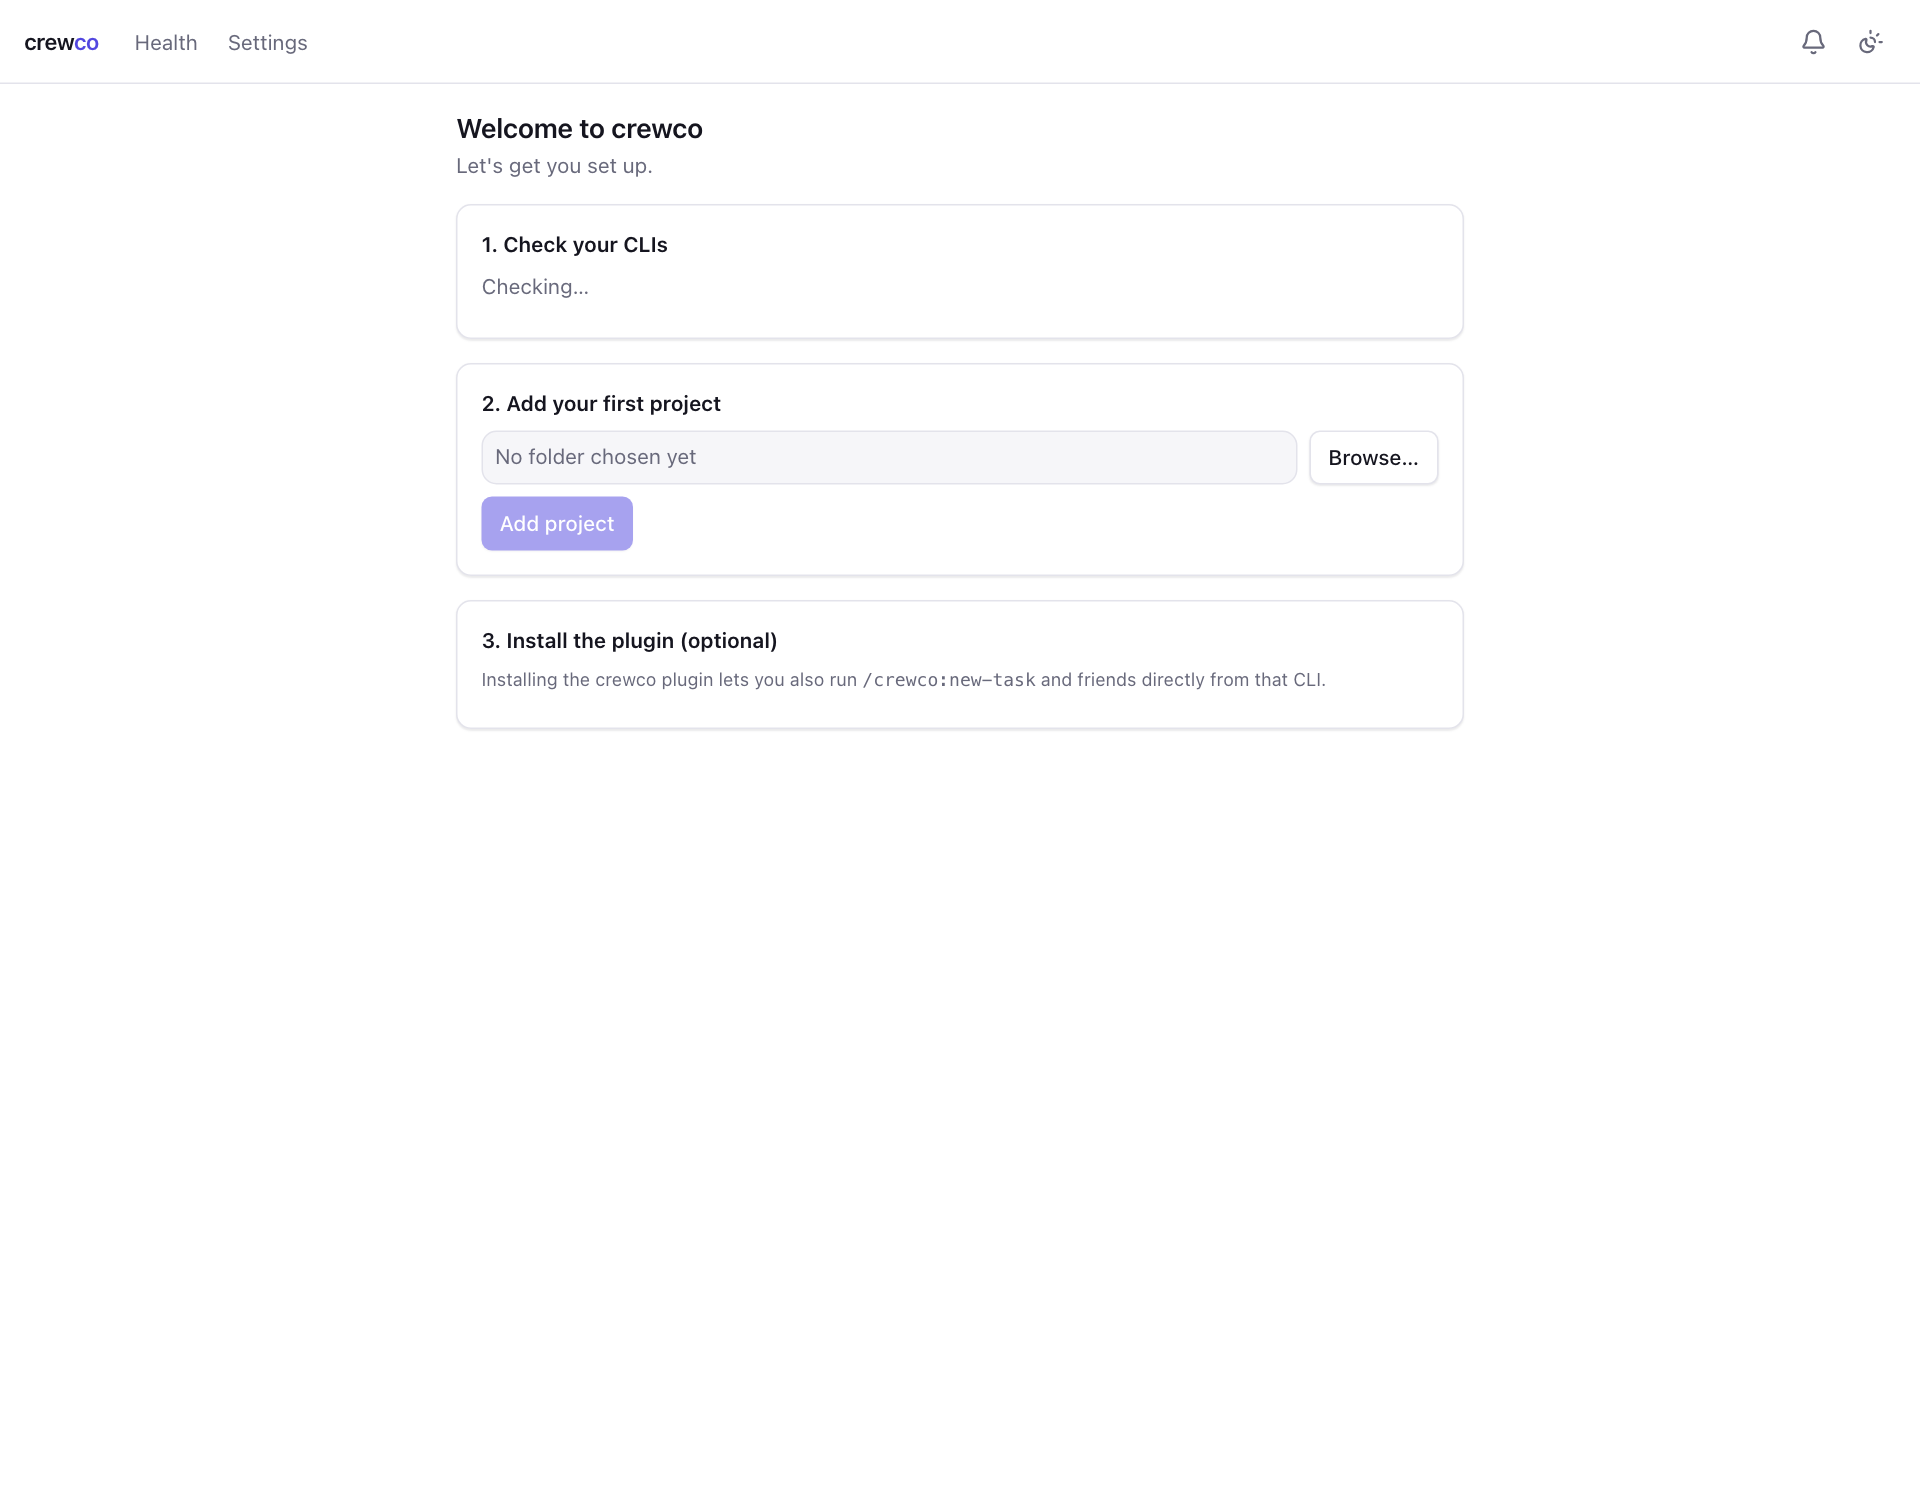
/crewco:new-task from inside that CLI.A red cross next to a CLI means it is missing or not logged in. You only need one working CLI to start, and you can fix the others later from the Health page.
Use the web UI
The top bar links to everything: Board, Usage, Team, Profile (these four are per project), then Health and Settings. The bell shows anything that needs your decision, such as a commit approval.
Projects
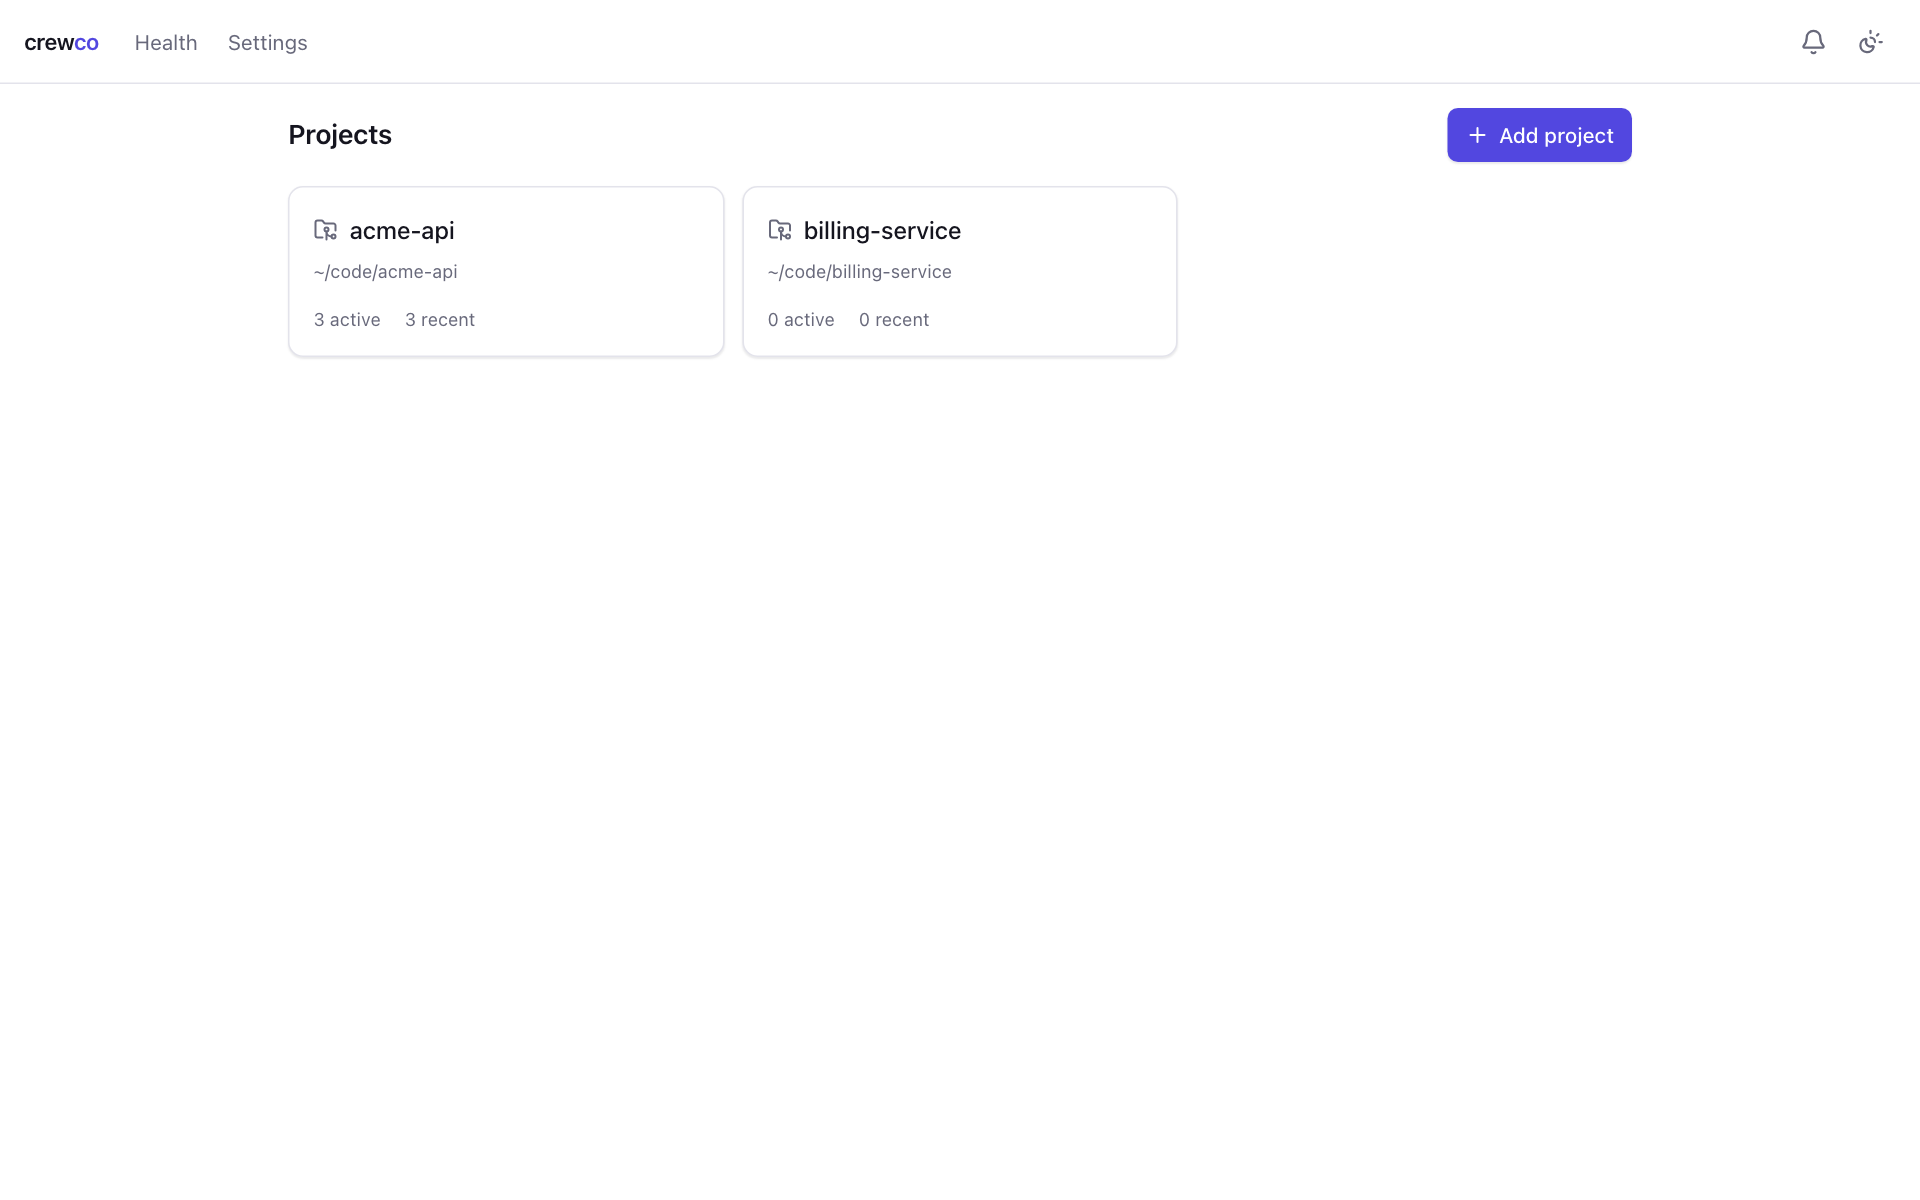
A project is a git repository. Add one with Add project and the folder picker. Each card shows the folder and how many tasks are active or recent. Click a card to open its board.
The board
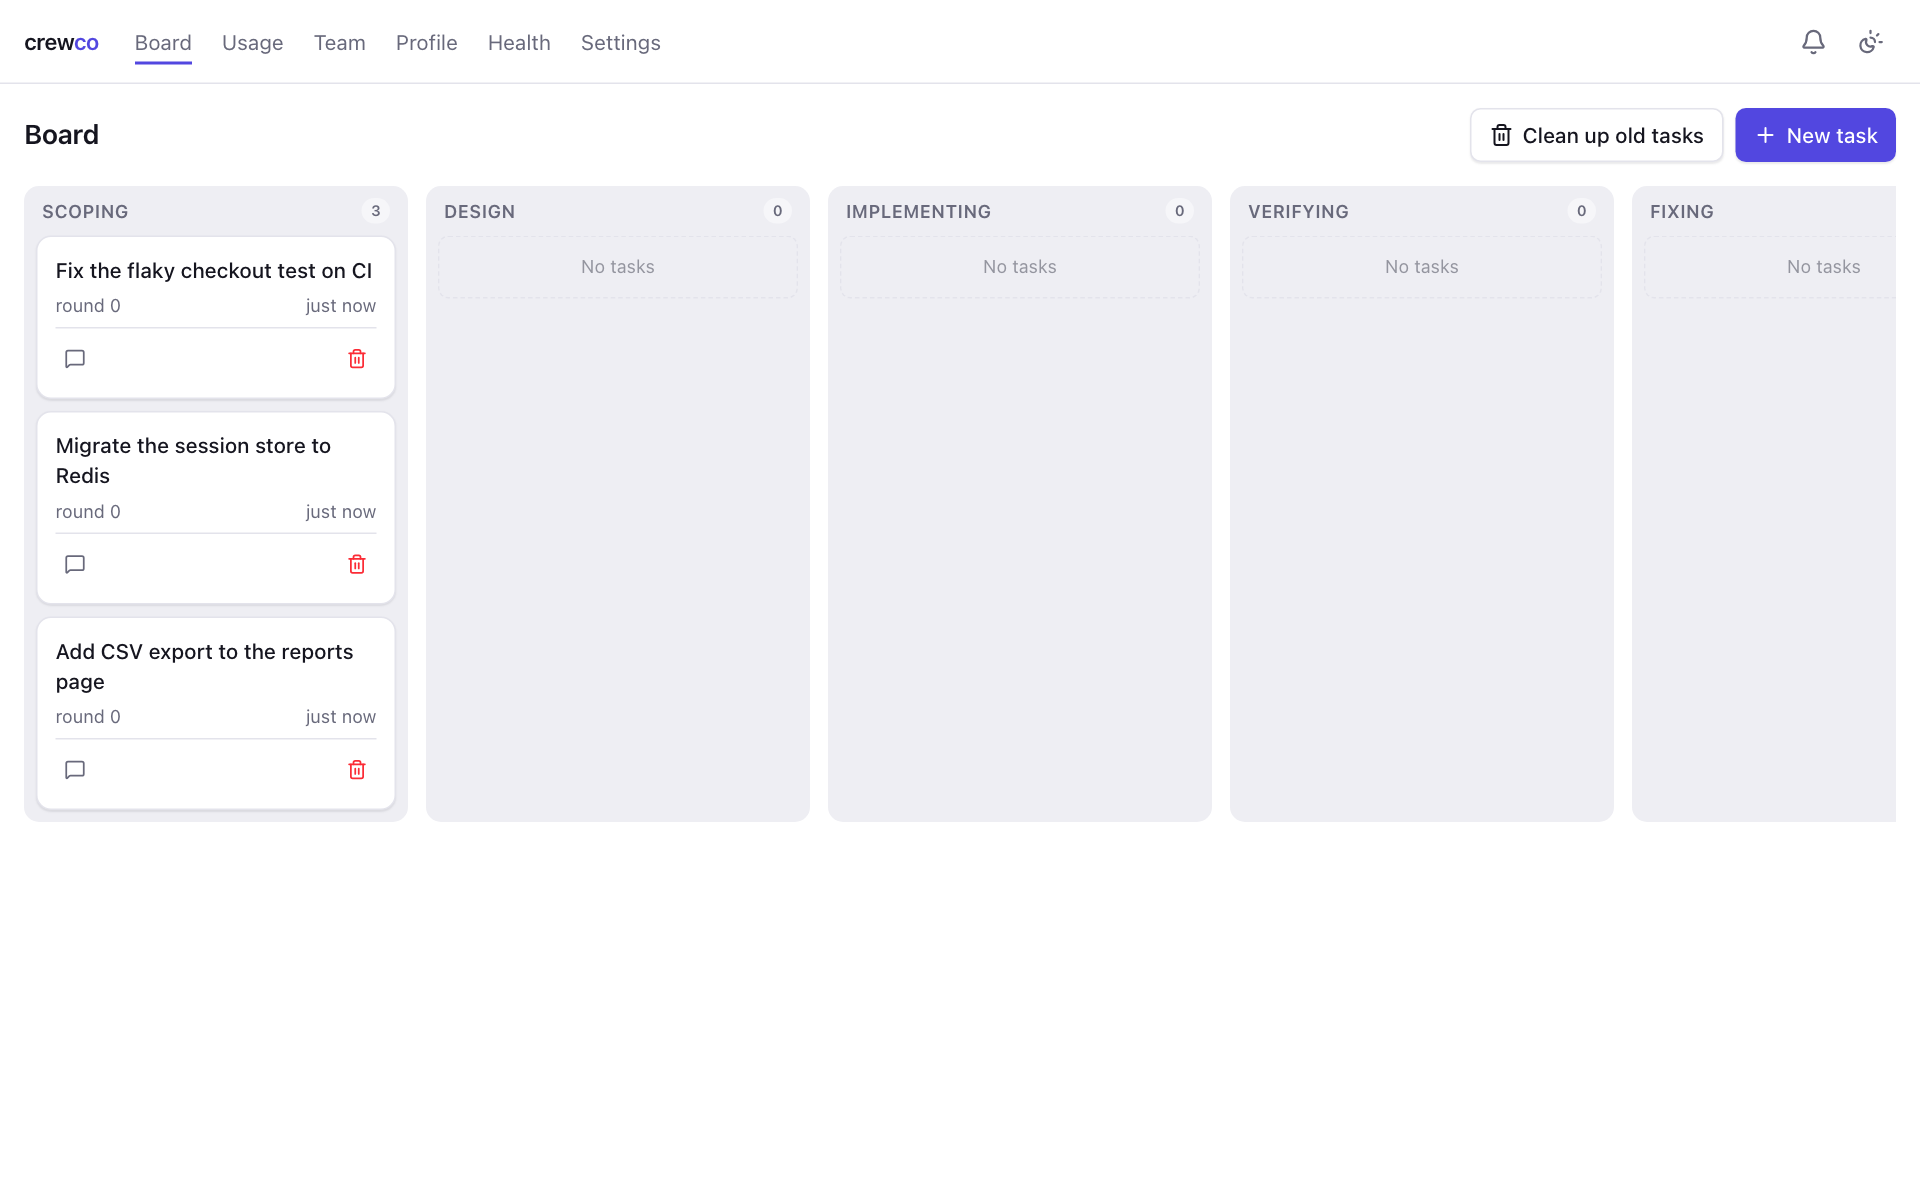
The board has one column per phase a task passes through, left to right: Scoping, Design, Implementing, Verifying, Fixing, Awaiting commit and Done. Each card shows the title, the current round and when it last changed. The chat icon reopens the scoping conversation, and the bin icon deletes the task, in any phase.Clean up old tasks opens a list of finished tasks older than 30 days by default, so you can delete them in bulk.
Create a task
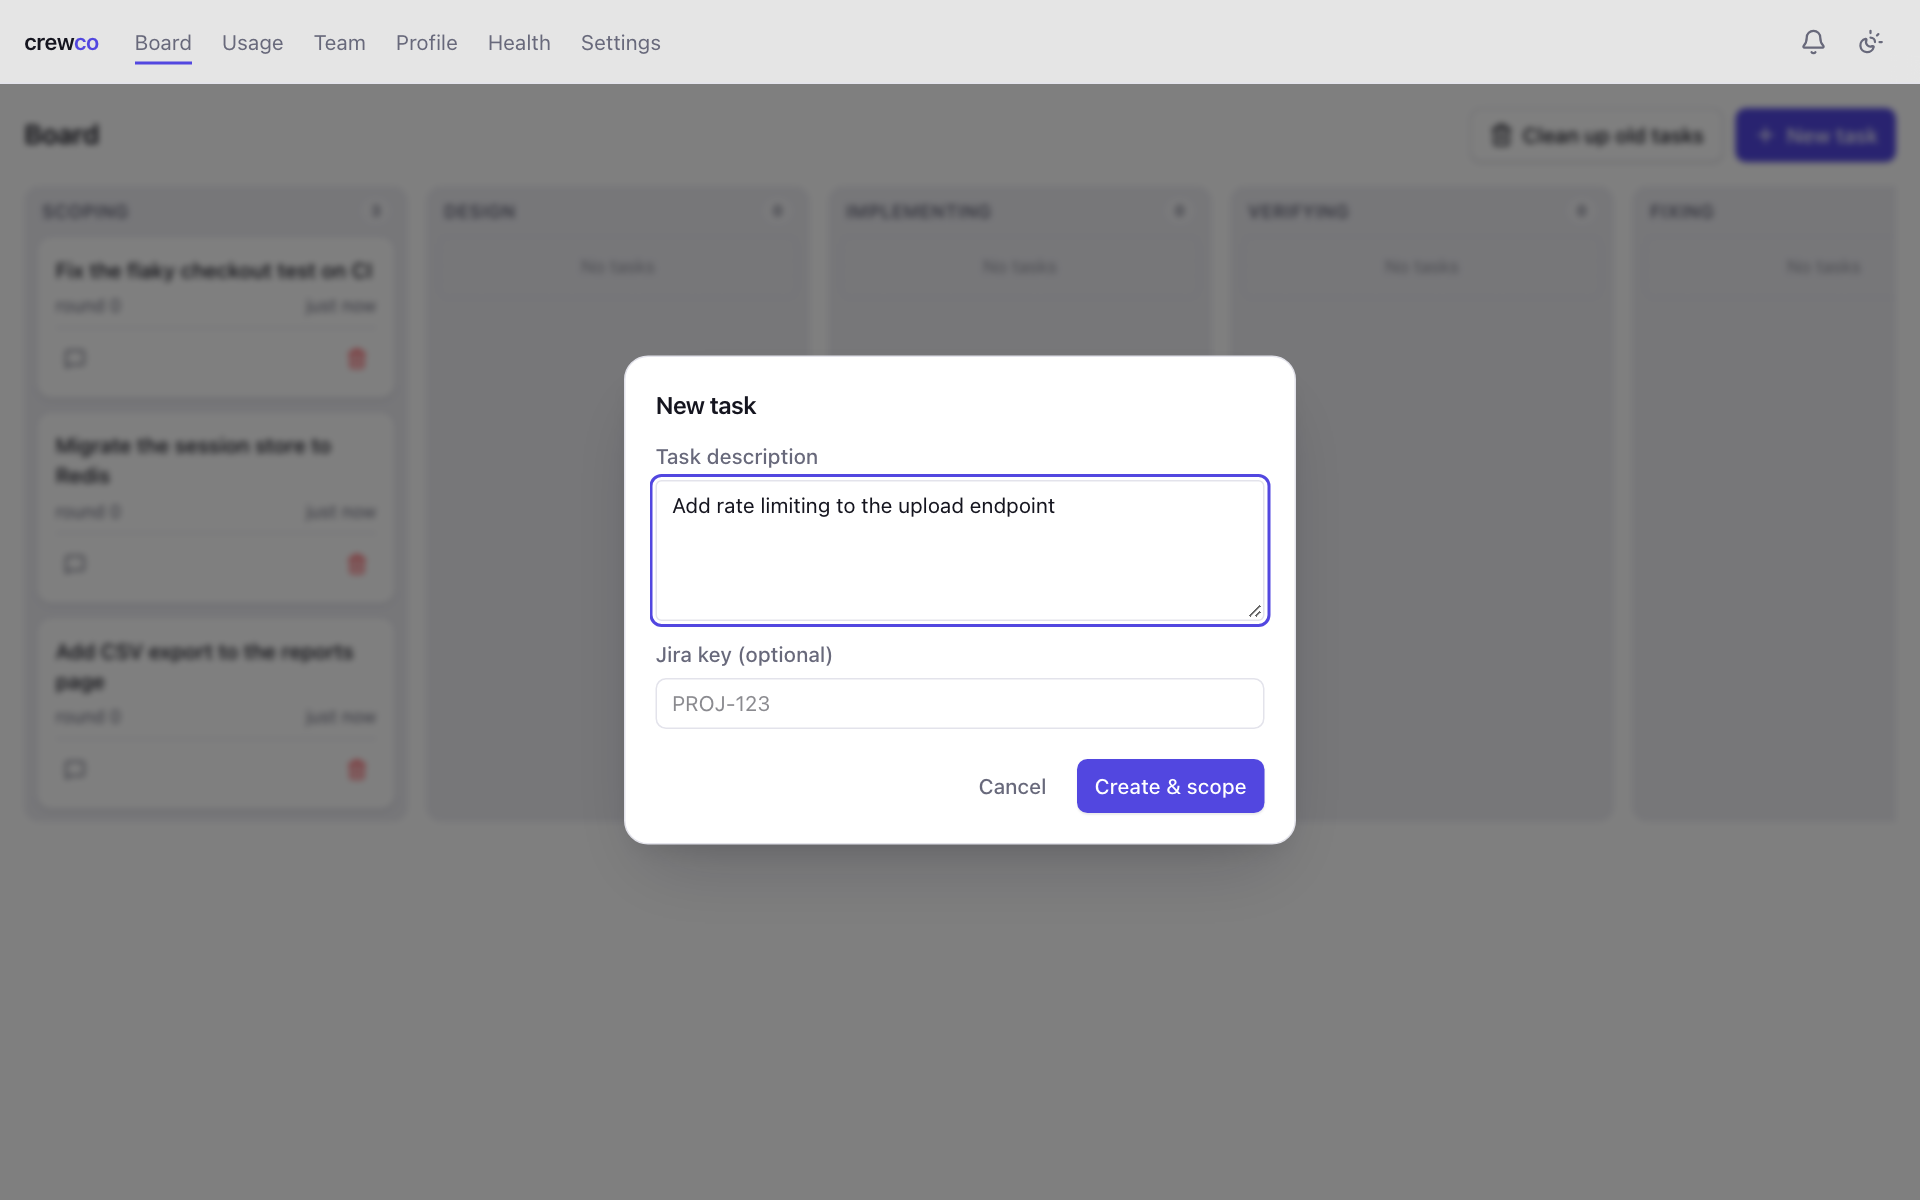
Click New task, describe what needs to be done in plain language, and click Create & scope. If the work comes from Jira, add the ticket key (for example PROJ-123) too. You do not need to be precise. The next step is a conversation that fills in the gaps.
Scope with the lead
Pick the CLI and model the Team Lead should use, then click Start scoping. The lead reads your task and asks what it needs to know.
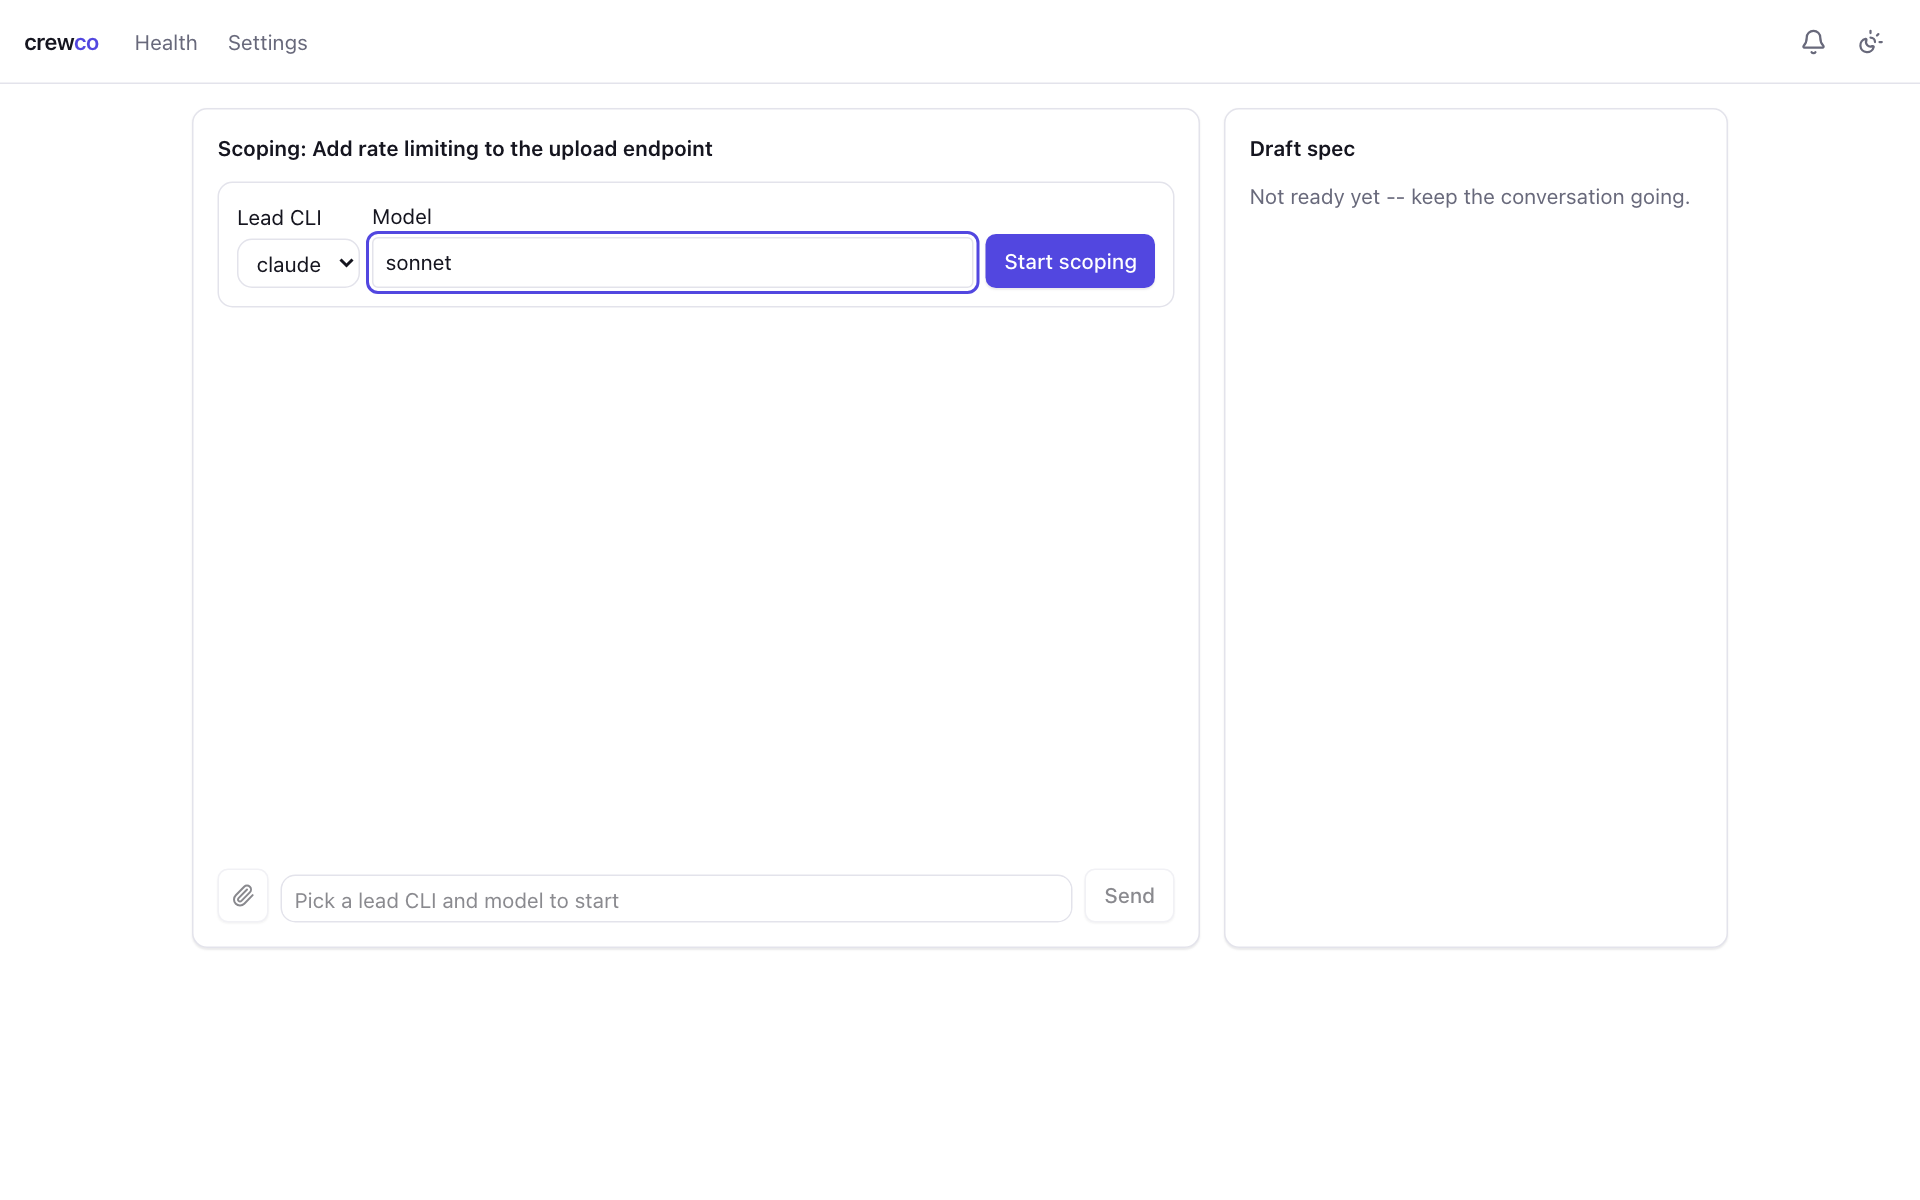
Answer in the chat box. Press Enter to send and Shift+Enter for a new line. The paperclip attaches images, such as a screenshot of a bug. When the lead has enough, the Draft spec panel shows a title, description, acceptance criteria, affected areas and what is out of scope.
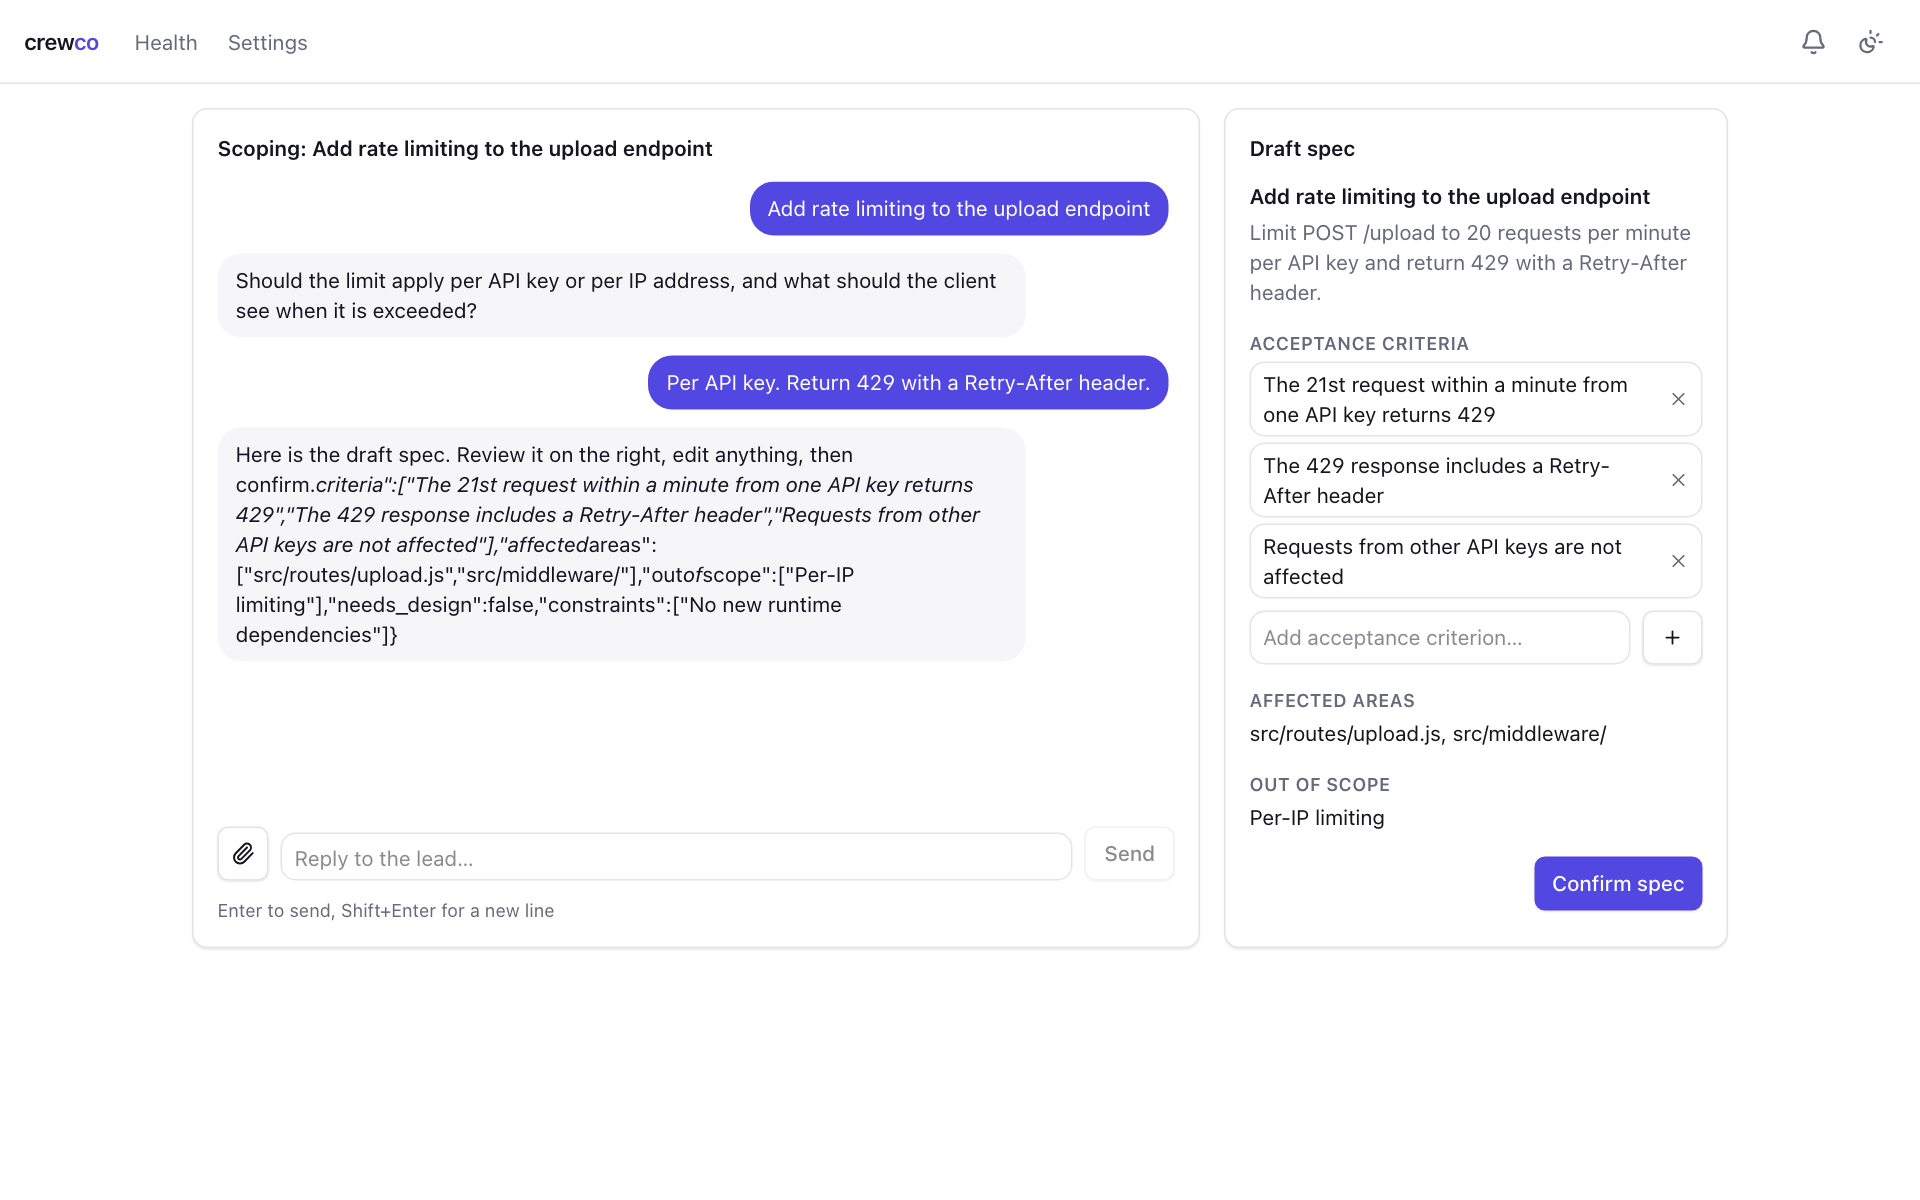
When the spec reads right, click Confirm spec.
Confirm the lineup
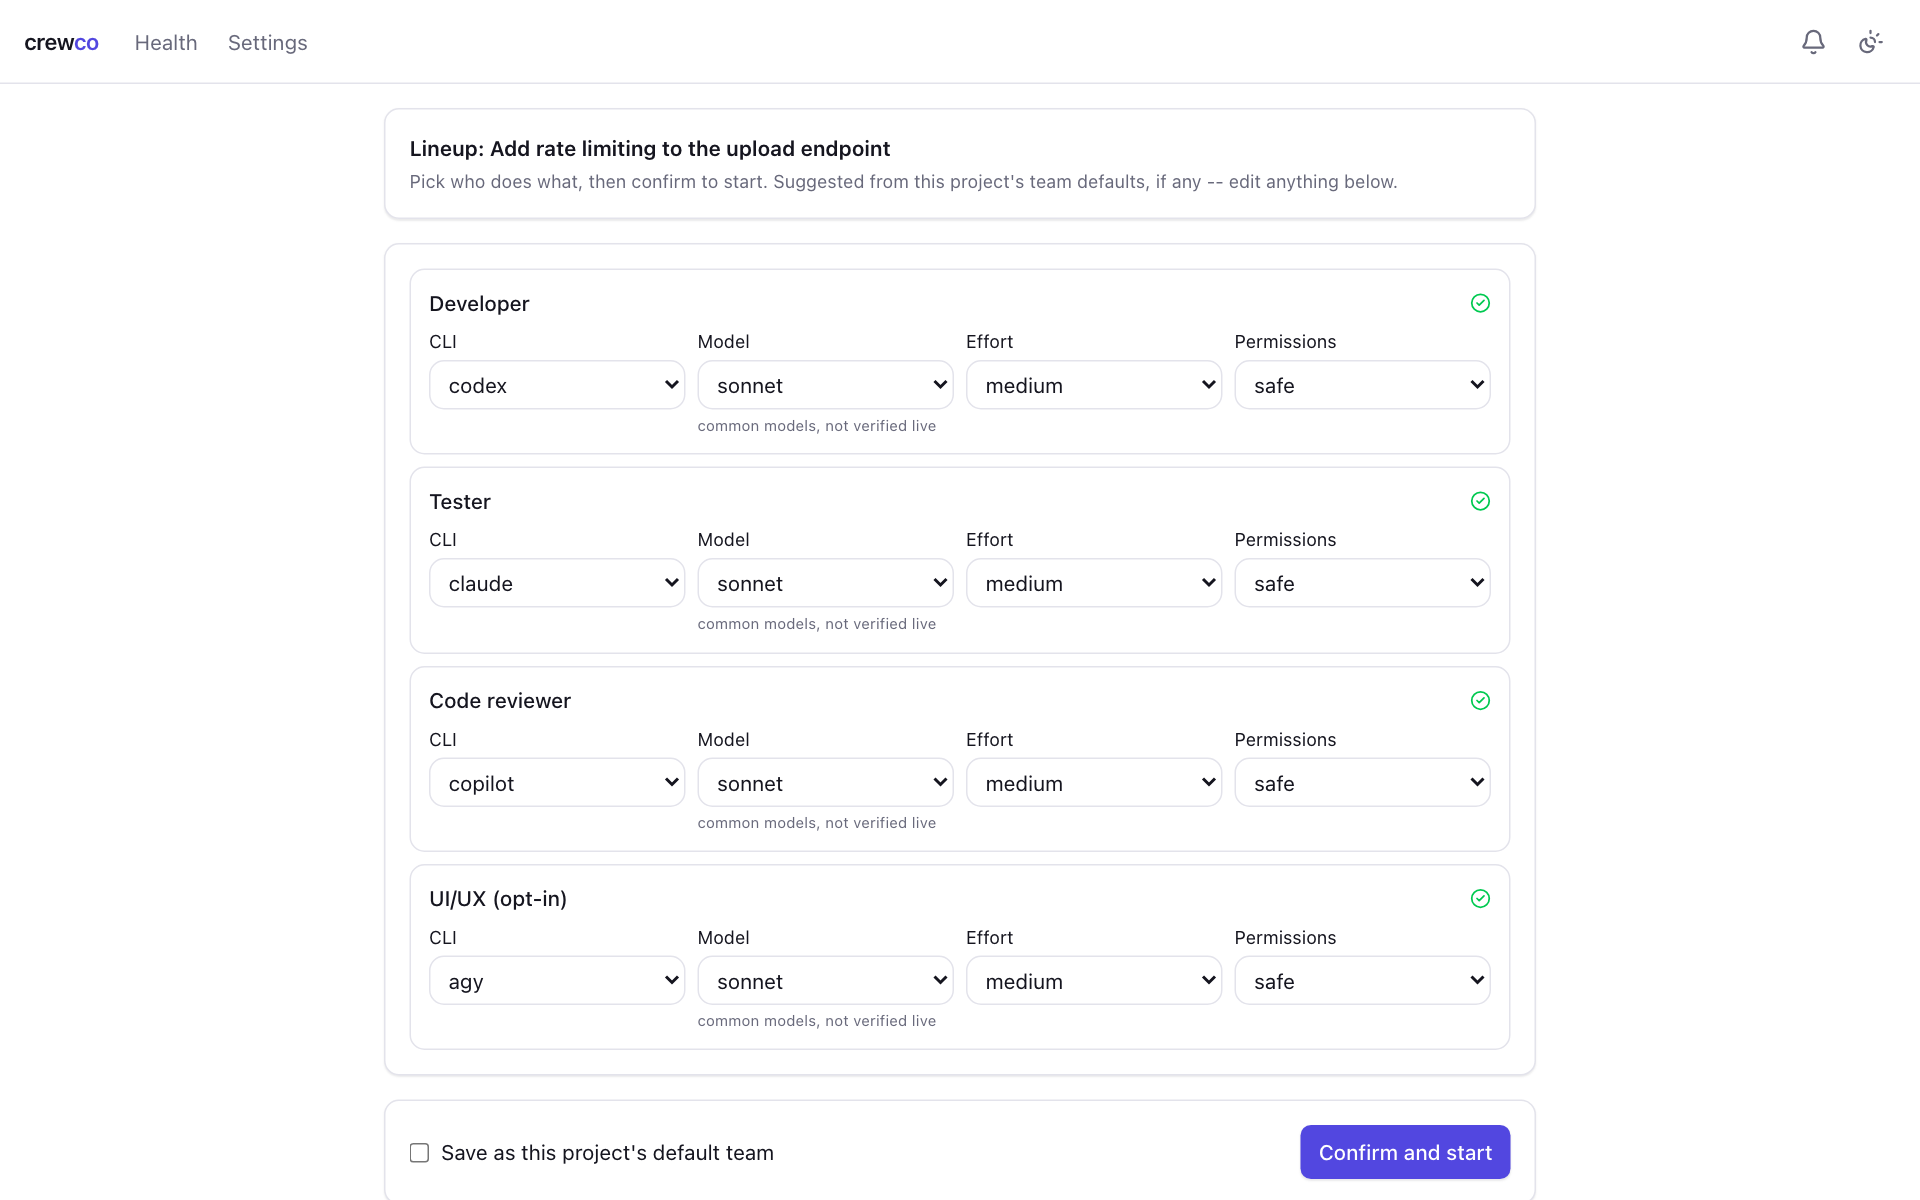
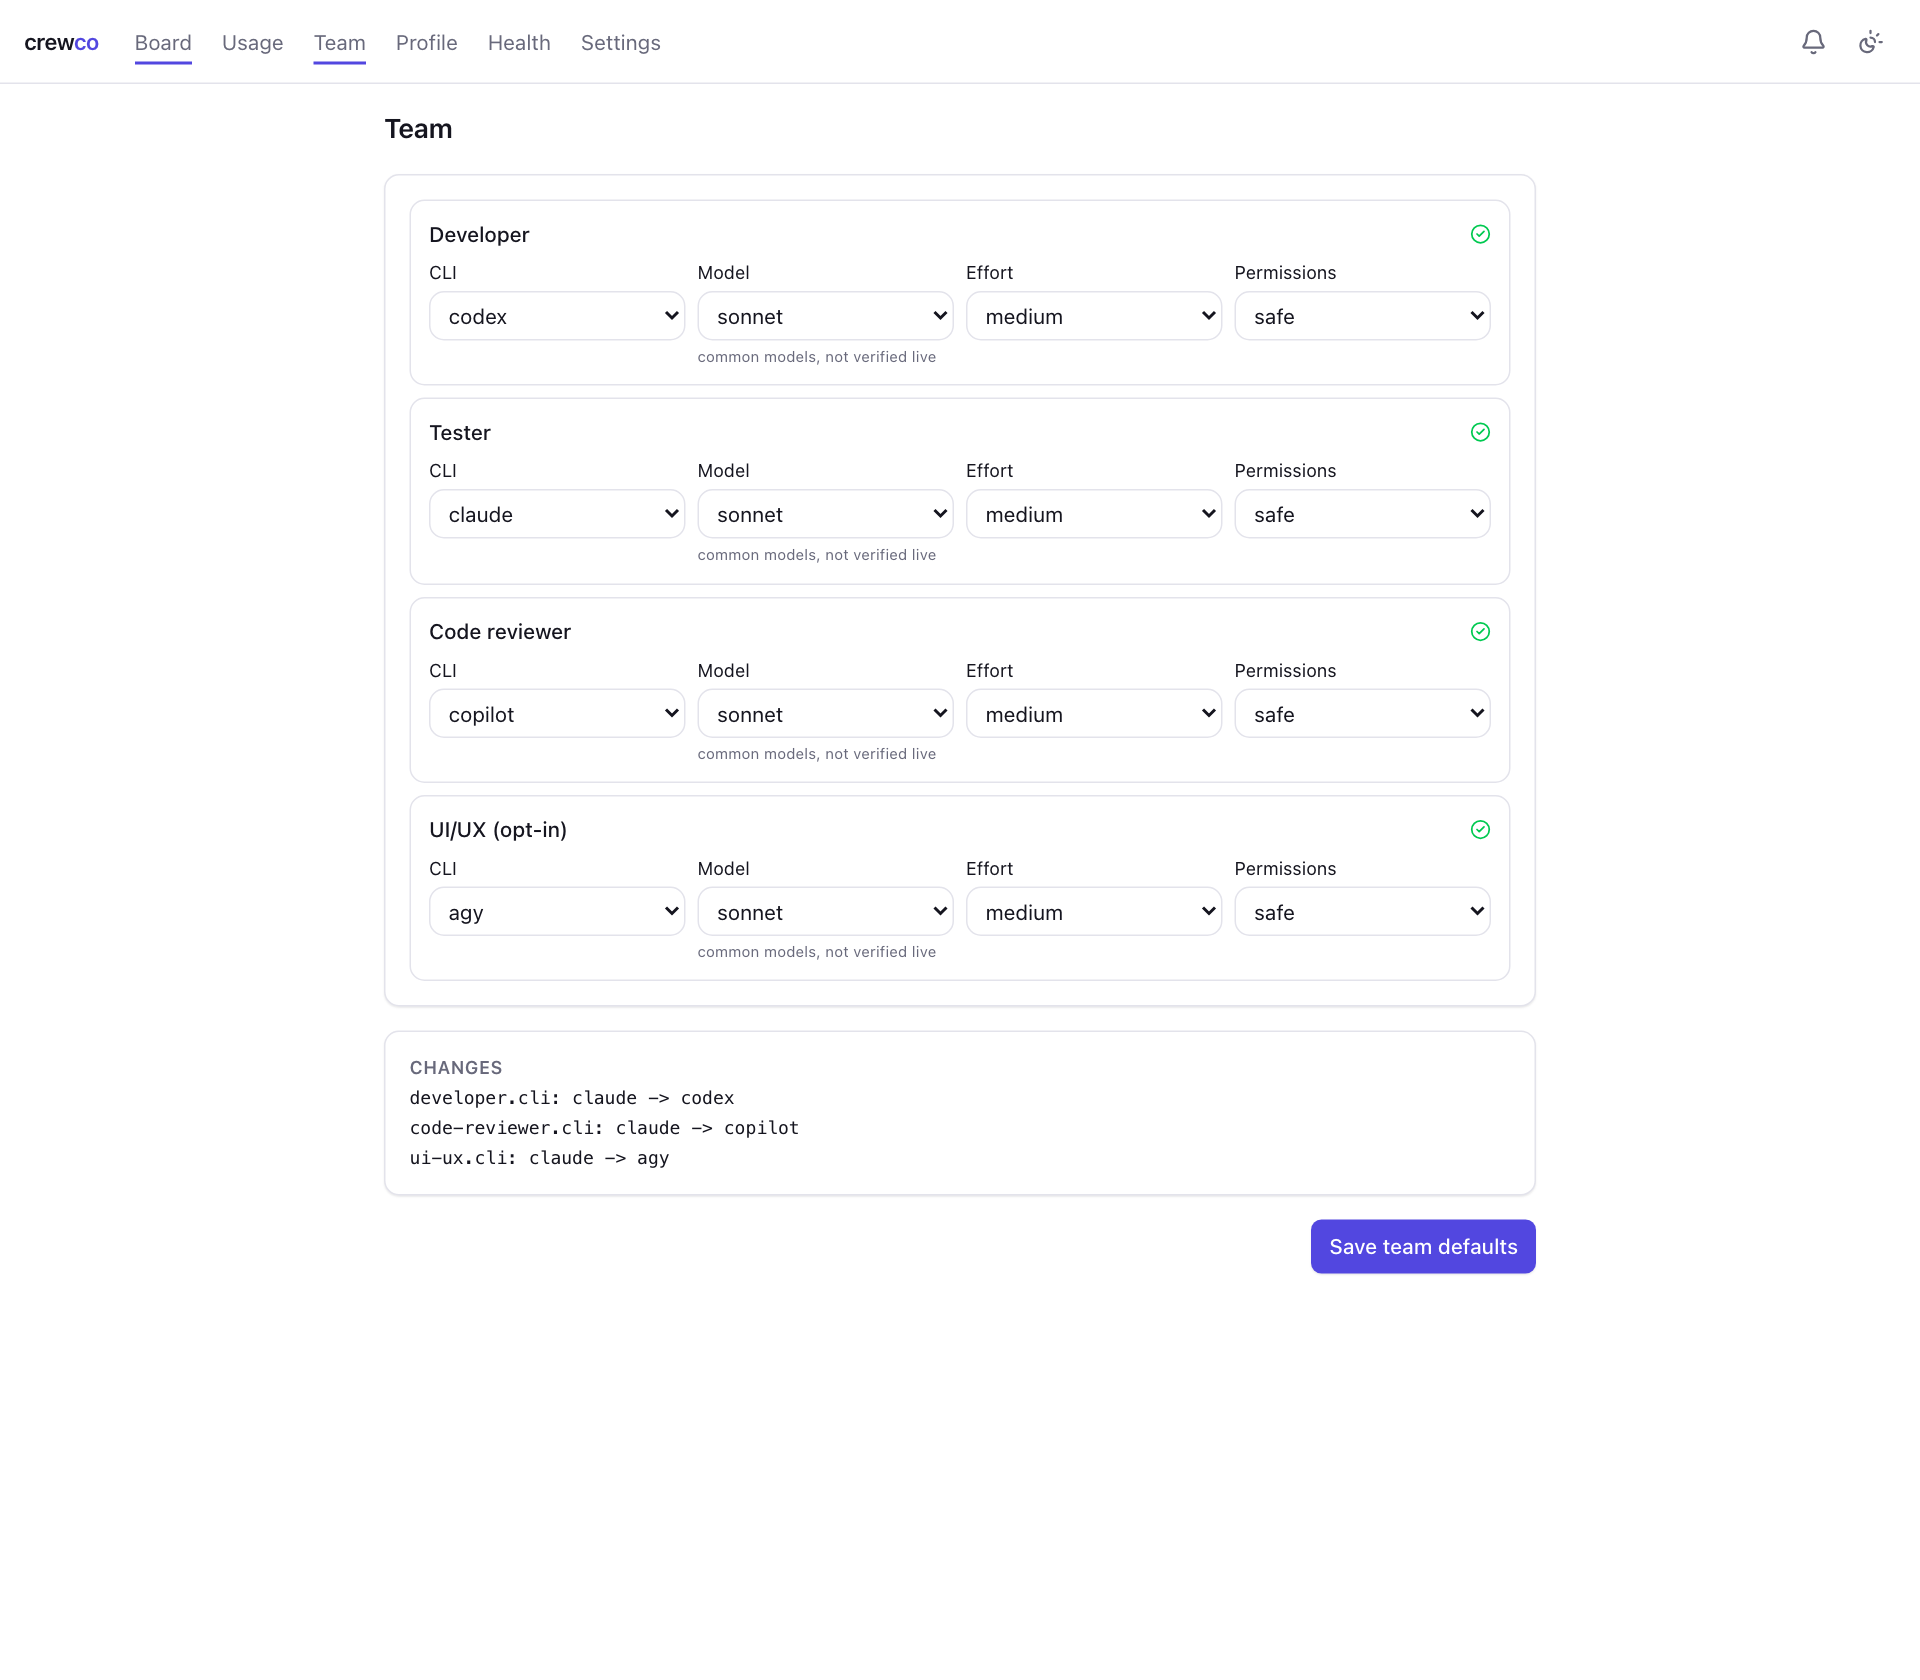
The lineup decides who does what. For each role you choose the CLI, the model, the reasoning effort and the permissions. Mixing CLIs is the point: put the Developer on Codex, the Reviewer on Copilot, and the Designer on Antigravity.
| Setting | What it does |
|---|---|
permissions: safe | The CLI runs sandboxed or with scoped tools. |
permissions: skip | The CLI skips its permission checks. The Developer defaults to this so it can edit files without stopping to ask. Use it only in projects you trust. |
| Code Reviewer | Always read-only, whatever the permissions setting says. |
| UI/UX (opt-in) | Only runs when you include it for the task, before any code is written. |
Click Confirm and start to begin. Defaults come from the project's team (see Team defaults), or from the machine-wide default lineup in Settings if the project has none yet.
Watch it run
The task page shows the phase badge, the current round, the branch and worktree, and a chip for every role in the lineup with its CLI, model, effort and permissions. While it runs you can Cancel it. If it was interrupted, Resume continues from where it stopped, and Copy resume command gives you the crewco resume line for the terminal.
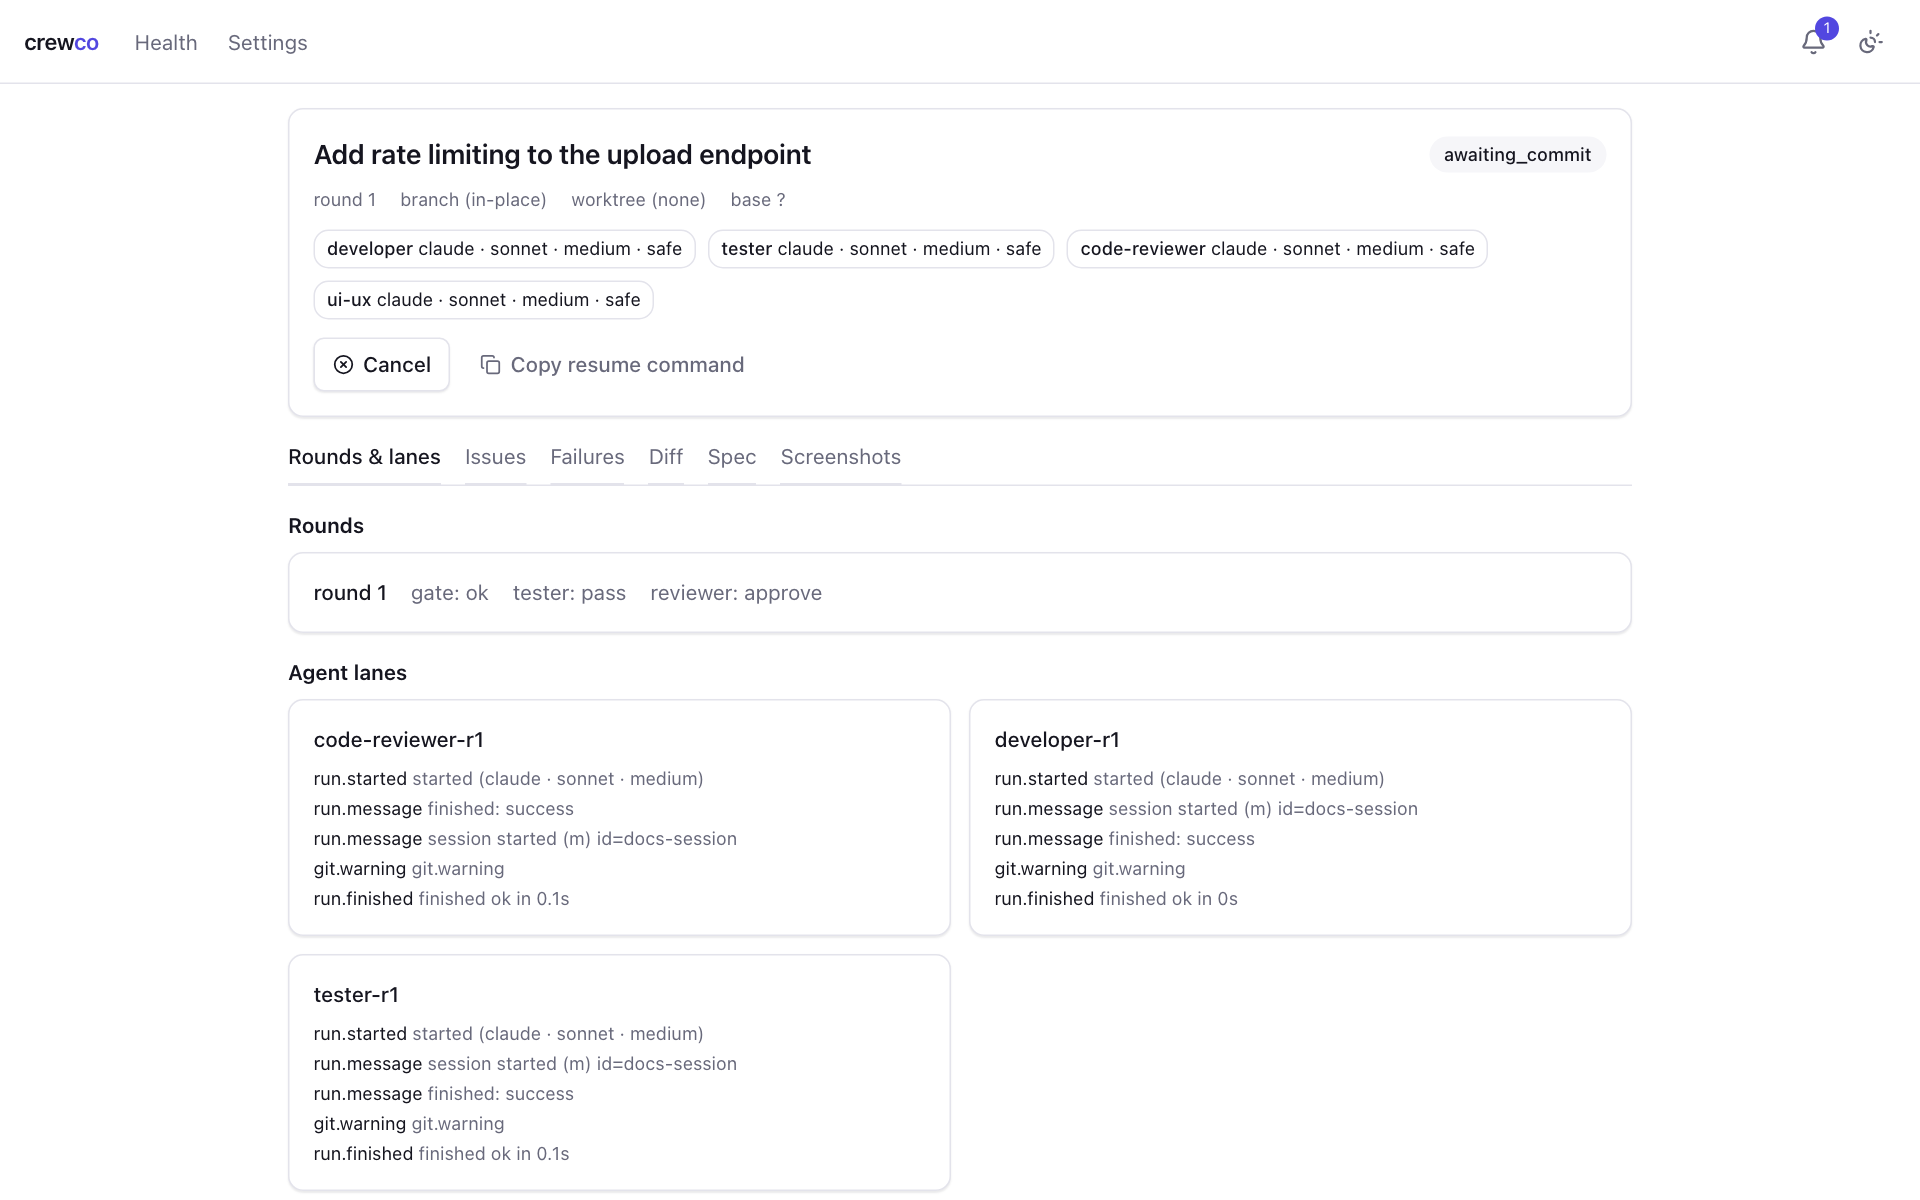
Below the header there are tabs: Rounds & lanes, Issues, Failures, Diff, Spec and Screenshots. If a round finds problems, they show under Issues and Failures and go back to the Developer for the next round.
Approve the commit
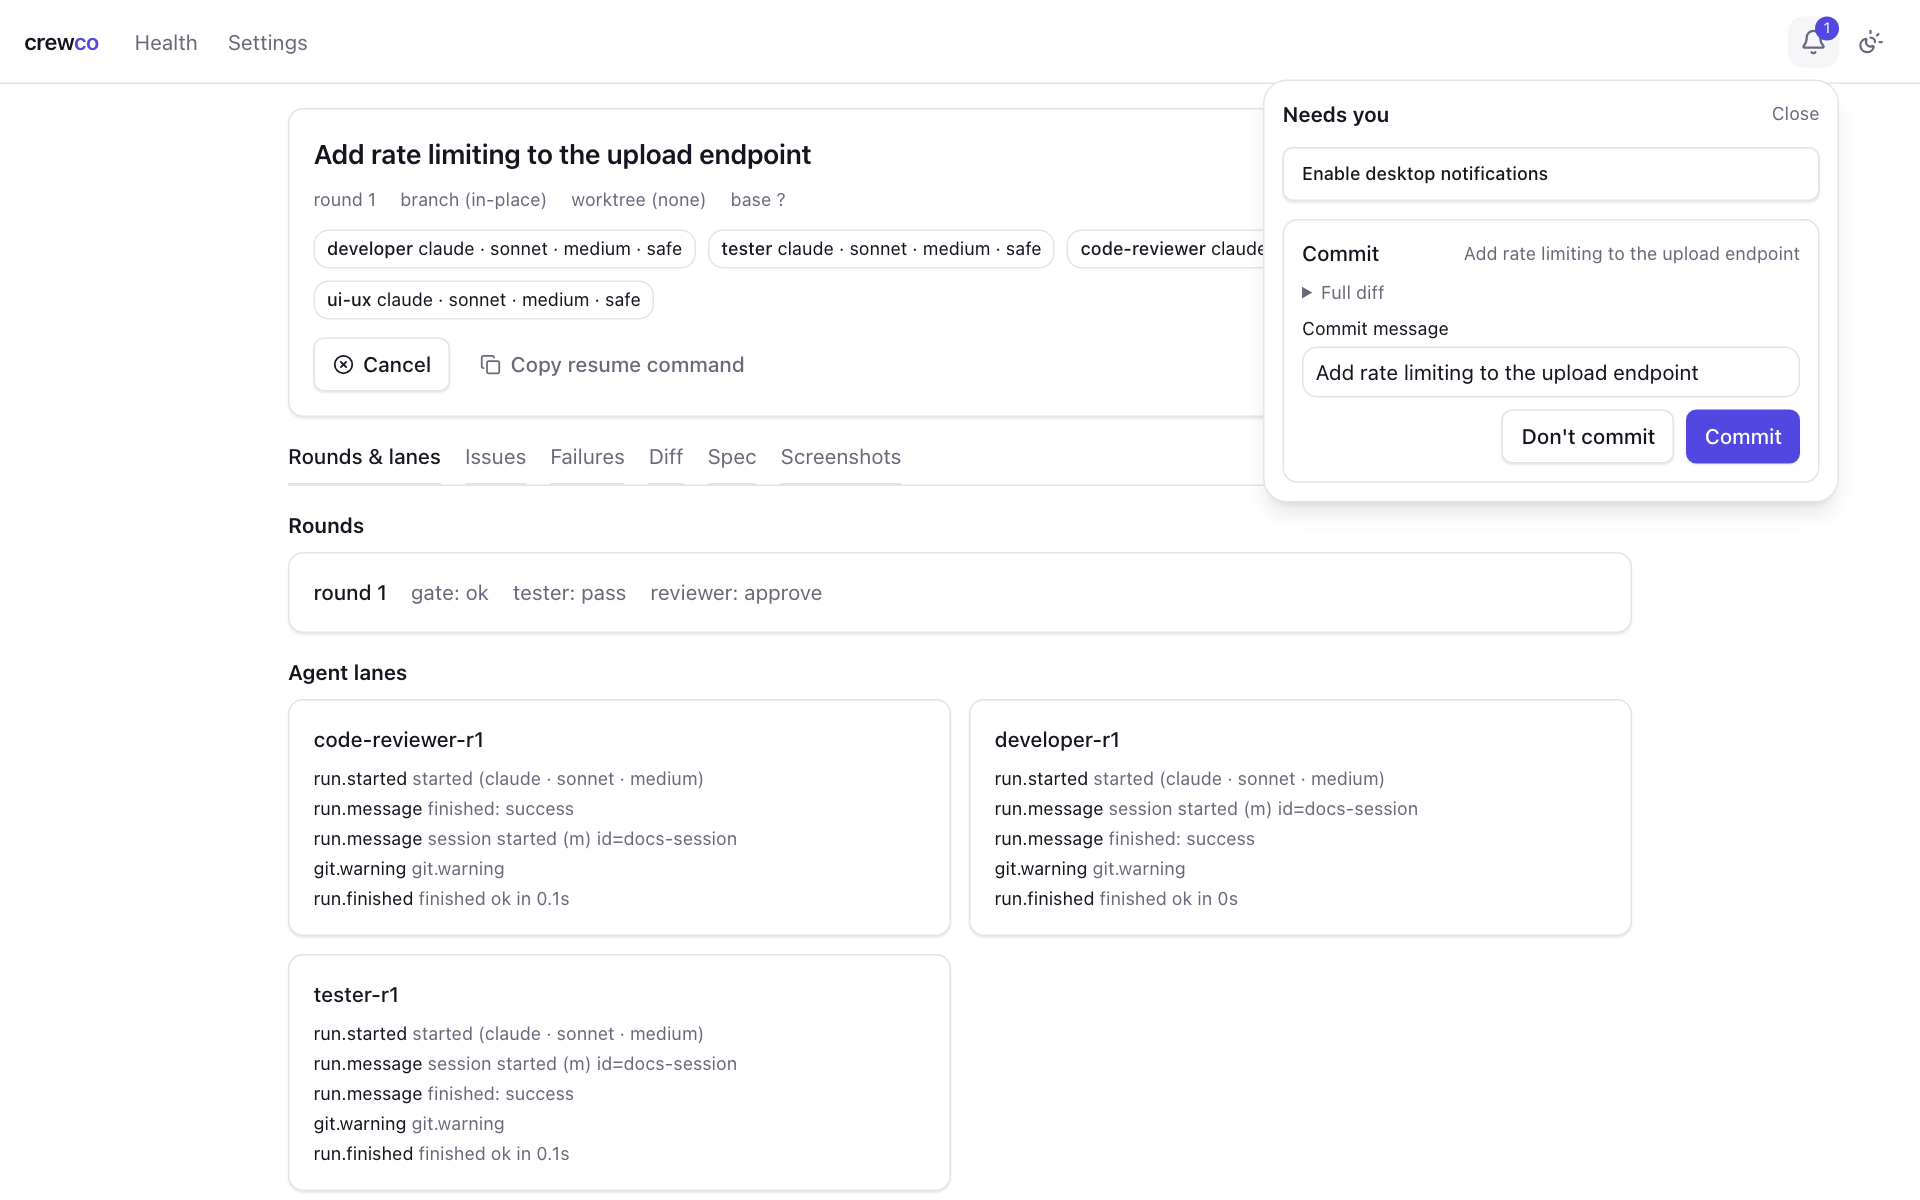
When the work is ready, the task moves to Awaiting commit and the bell shows a count. Open it to see the Needs you panel. Expand Full diff to read the change, edit the commit message if you want, then choose Commit or Don't commit.
Finished tasks
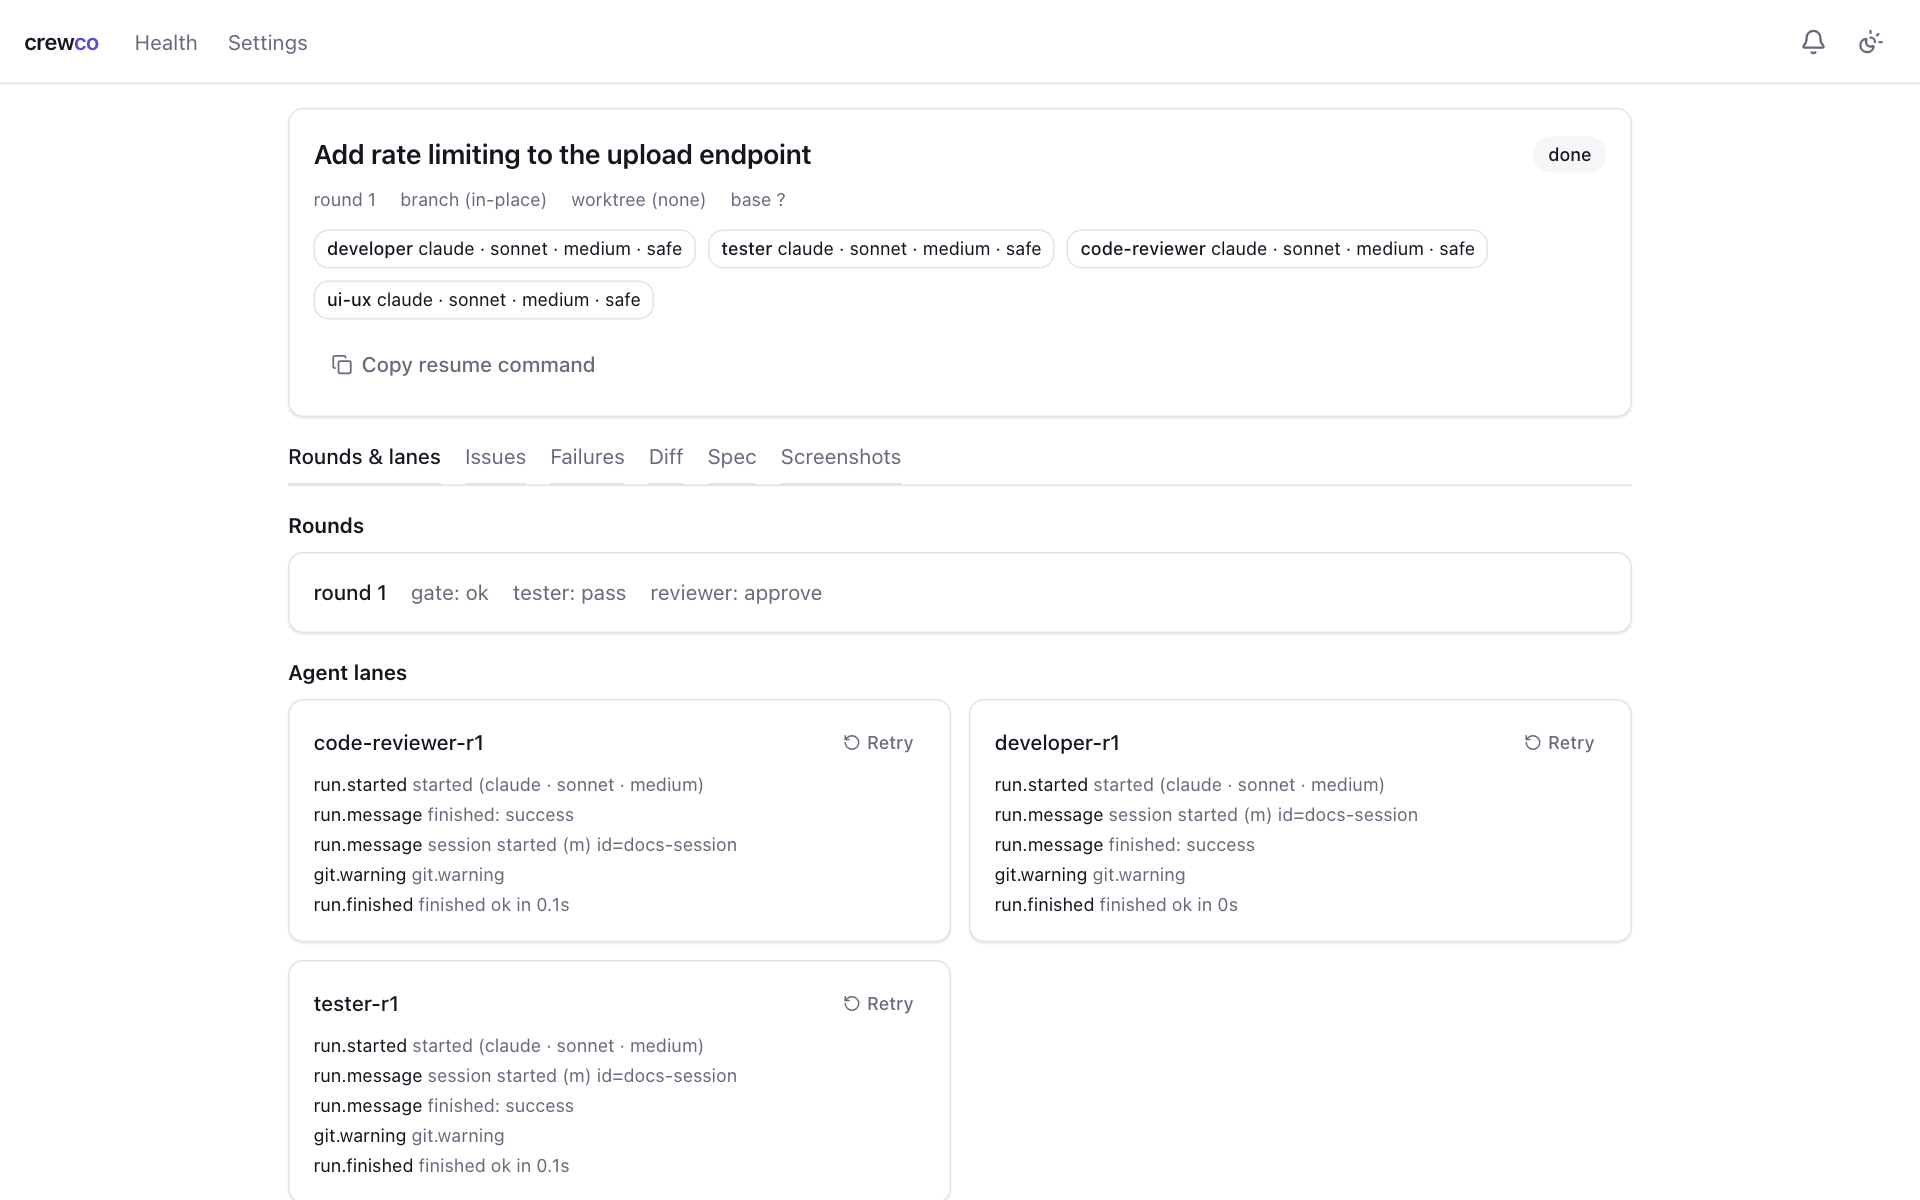
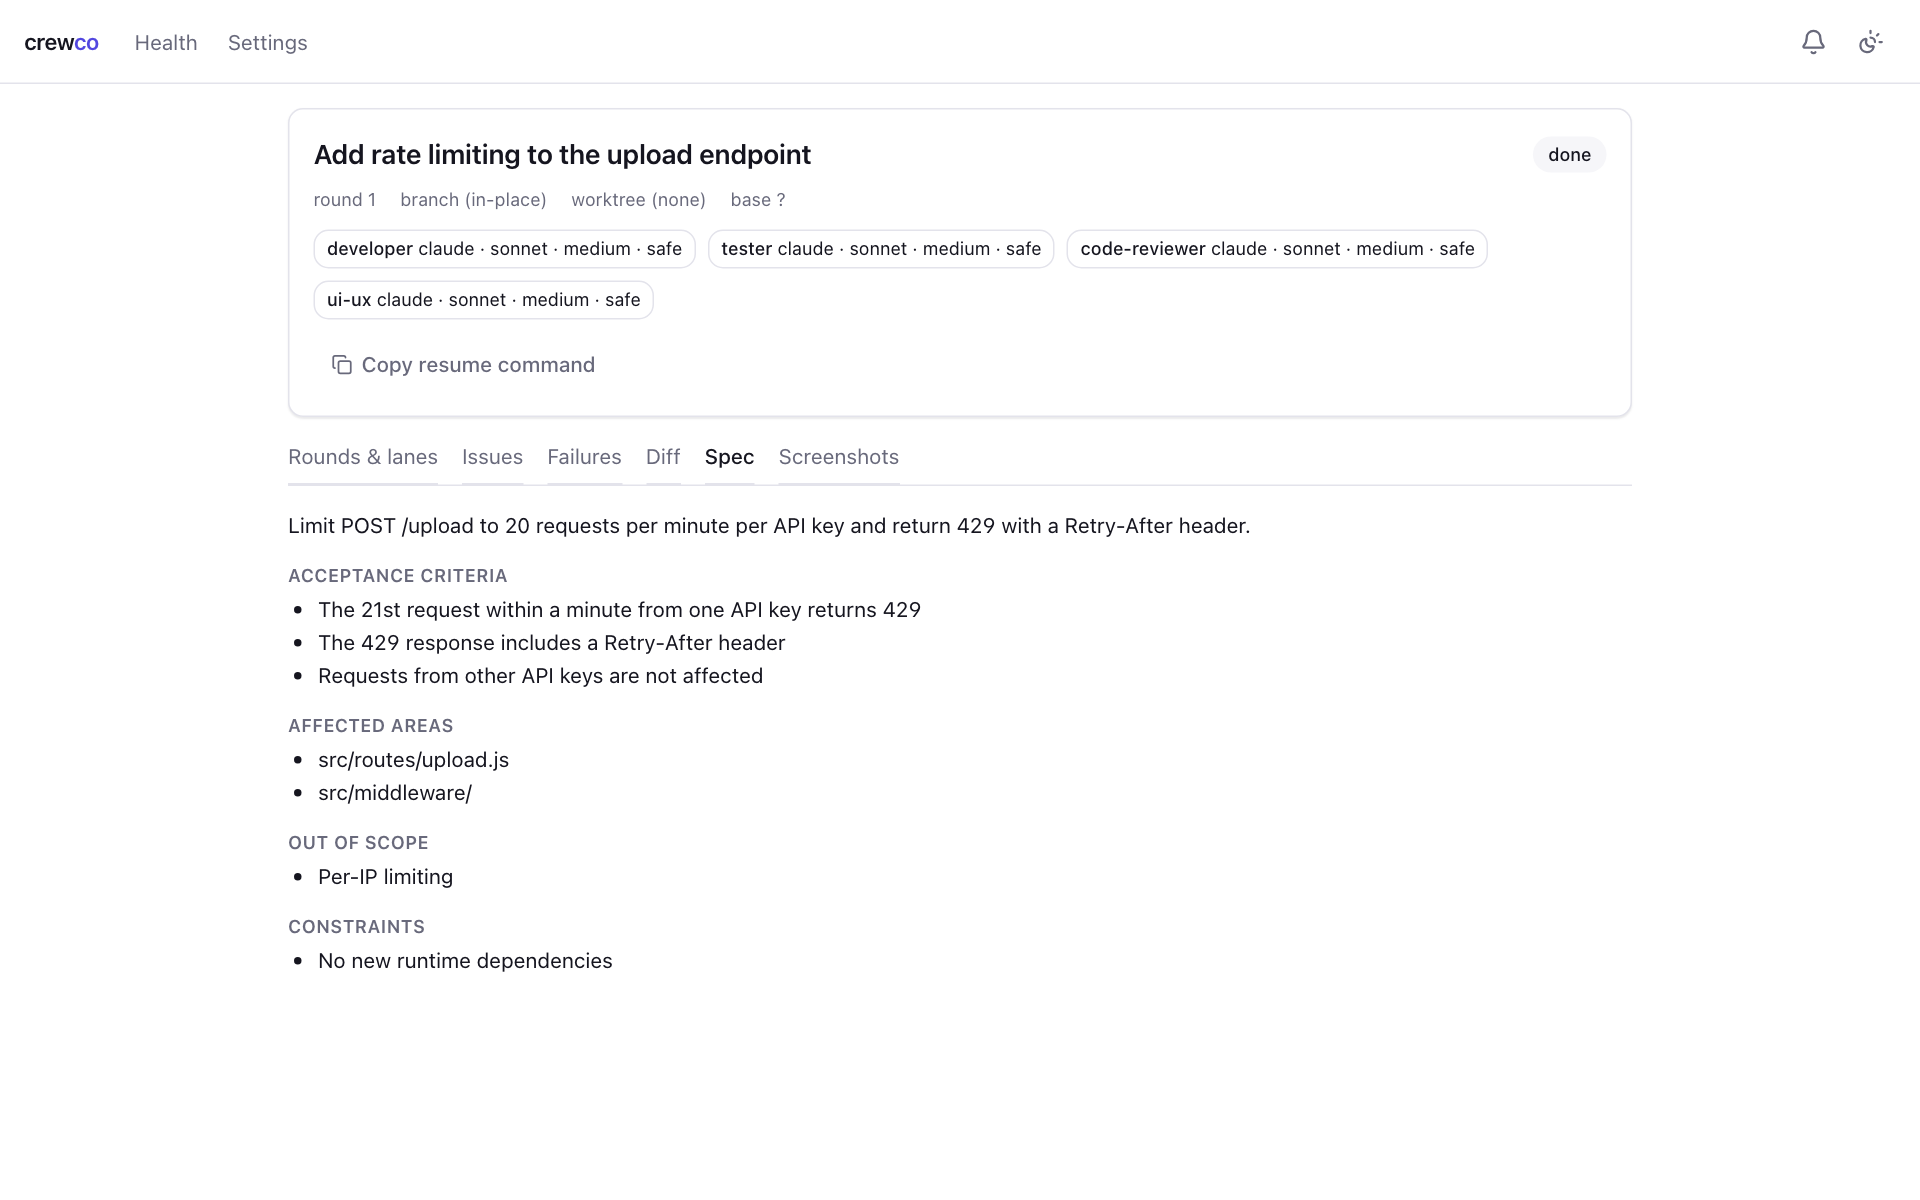
A finished task shows done. Every lane keeps a Retry button if you want to run one agent again. Open the Spec and Diff tabs to review what was agreed and what changed.
Team defaults
Team sets the default lineup for the project, saved to .crewco/team.json in the repo so the whole team shares it. New tasks start from it, and you can still change anything at the lineup step.
Project profile
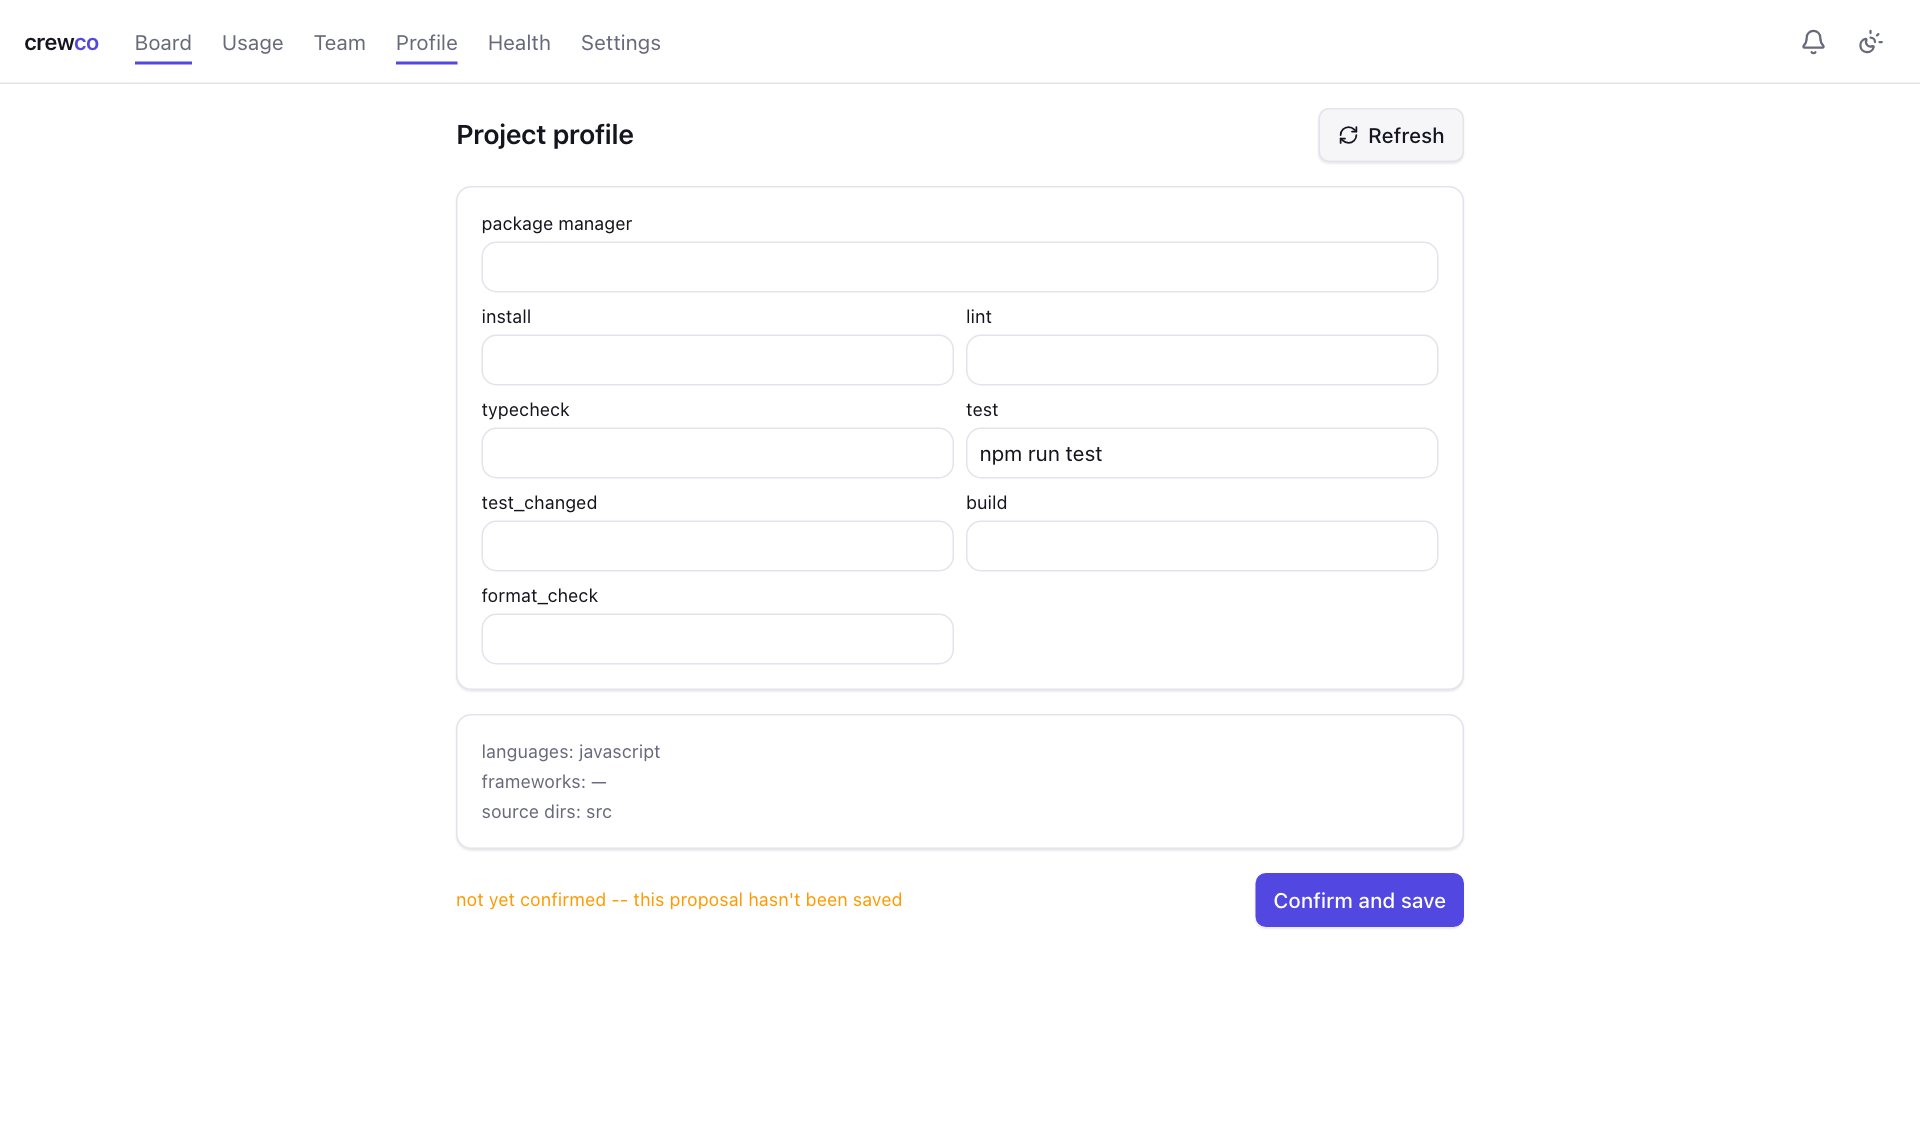
The profile tells CrewCo how your project builds and tests: the package manager and the install, lint, typecheck, test, build and format commands. Agents use it for the automatic checks that run between rounds. Click Refresh to detect it from your repo, correct anything that is wrong, then Confirm and save. It is stored in .crewco/project.json.
Usage
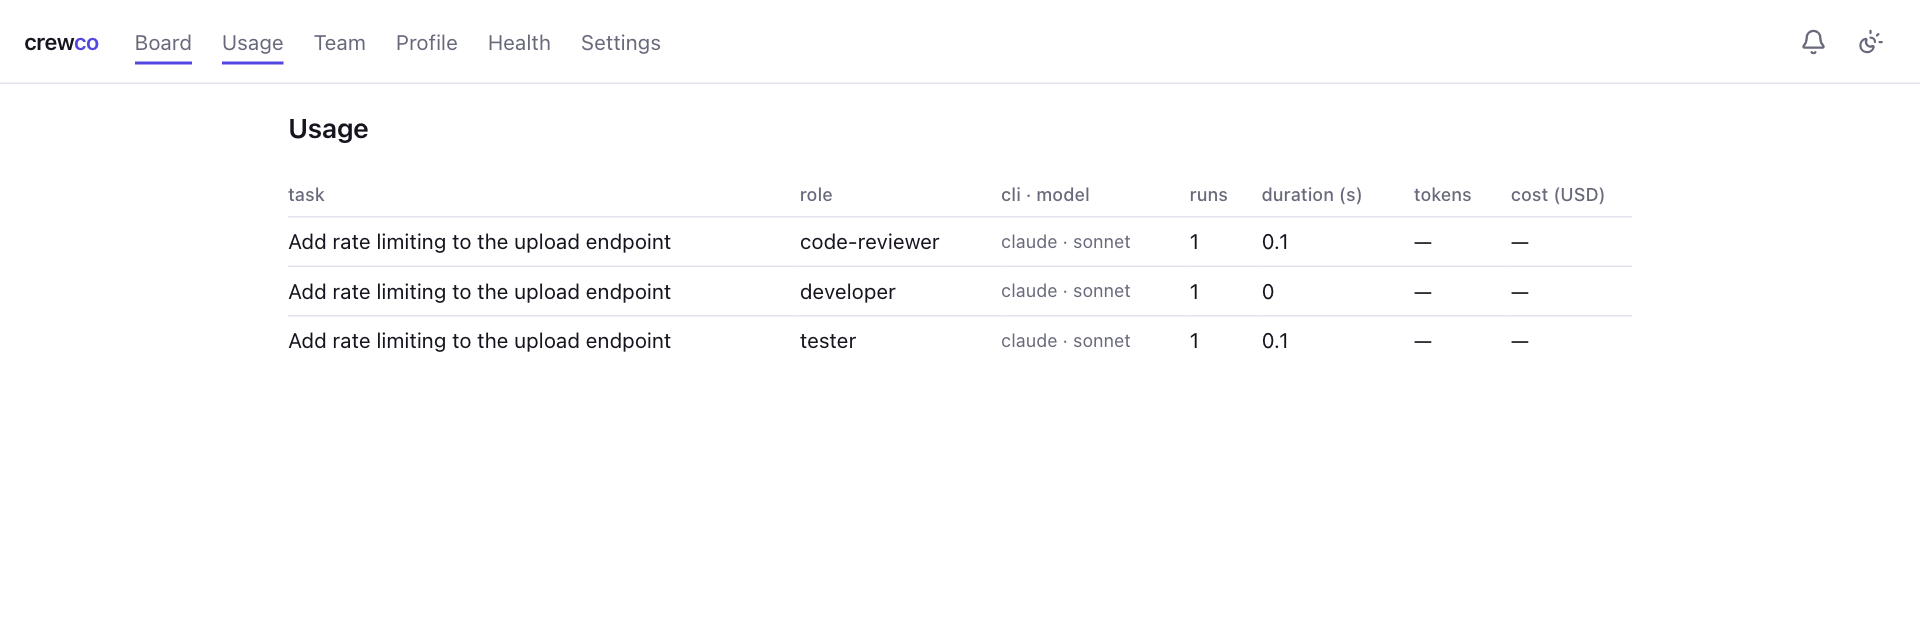
Usage lists every agent run for the project: the task, the role, the CLI and model, how many runs, how long they took, and tokens and cost where the CLI reports them.
Health
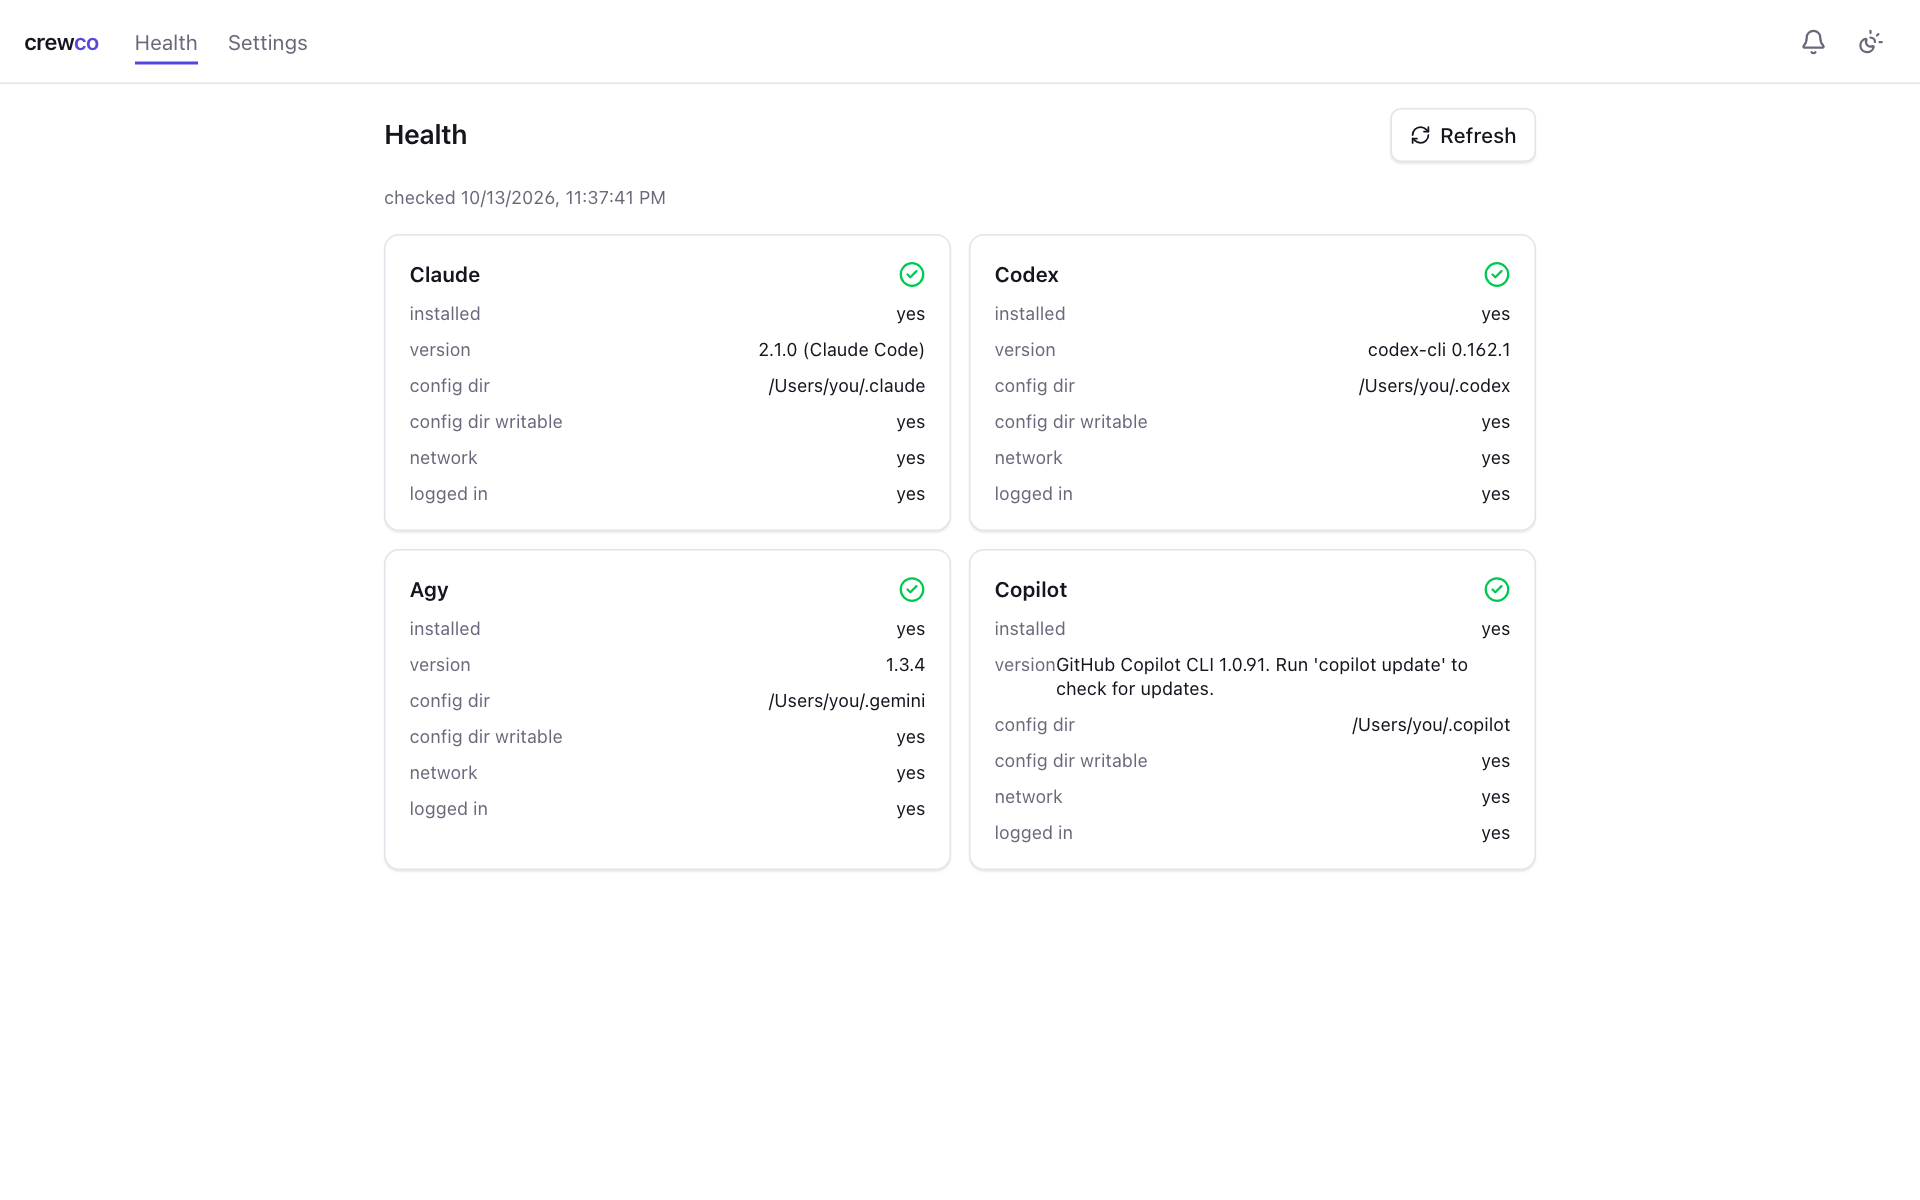
Health checks each CLI: whether it is installed, its version, whether its config folder is writable, whether the network is reachable, and whether you are logged in. Click Refresh after you fix something. A CLI that is not ready only affects whether you can use it in a lineup.
Settings
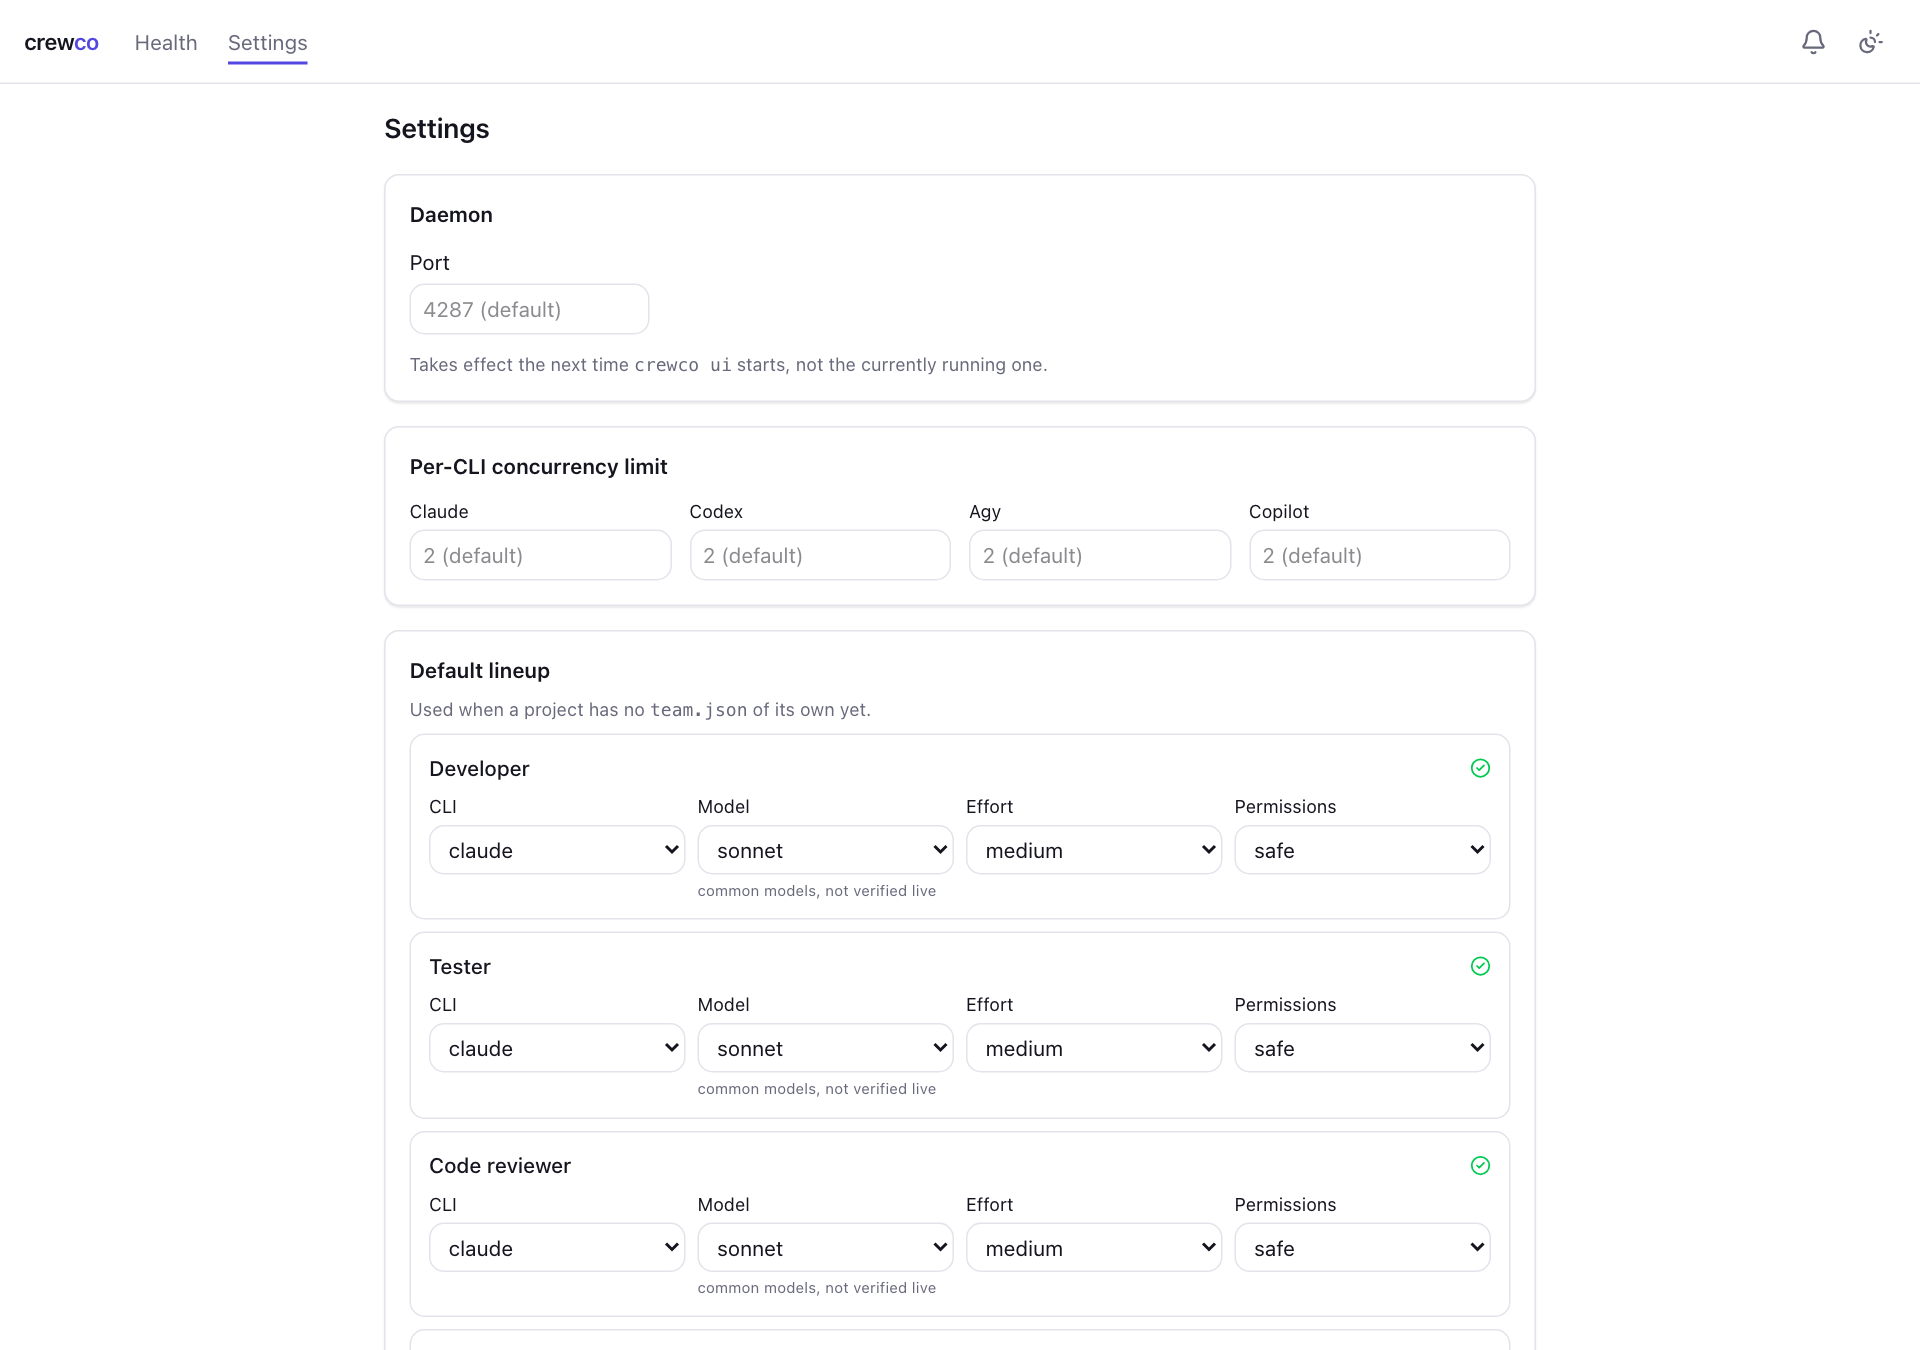
Settings edits ~/.crewco/config.json: the port (used the next time crewco ui starts), how many runs each CLI may have going at once (2 by default), and a machine-wide default lineup used when a project has no team of its own. Every field has a sensible default, so none are required.
Use the CLI
Everything the web UI does is also available from the terminal, and the two read and write the same .crewco/ files. Run commands from inside the project's git repository. Run crewco --help for the list.
crewco --help
crewco -- run the crewco workflow headlessly

Usage:
  crewco run "<task description>" [--yes] [--design] [--in-place]
                [--rounds N] [--dev cli[:model]] [--review cli[:model]]
  crewco status [task-id]
  crewco resume [task-id]
  crewco doctor [--cli claude|codex|agy|copilot]
  crewco team [show]
  crewco profile [show|refresh]
  crewco ui [--port N] [--no-open]
  crewco service install|uninstall
Run a task
crewco run runs the whole workflow without a browser: scope, lineup, fix rounds, commit.
crewco run "add rate limiting to the upload endpoint" --design --rounds 2
When a task passes on its first round, the output looks like this:
Dispatching developer (round 1)...
  developer: done
Running gate (round 1)...
  gate: ok
Dispatching tester + code-reviewer (round 1)...
  tester: done
  code-reviewer: done
Committed f7402426.

Add rate limiting to the upload endpoint: done.
Flags
| Flag | What it does |
|---|---|
--yes | Skip the confirmation questions and use the saved or default lineup. |
--design | Include the UI/UX Designer for this task without asking. |
--in-place | Work directly in your checkout instead of an isolated git worktree. For this task only. |
--rounds N | Set the maximum number of fix rounds for this task (the default is 3). |
--dev cli[:model] | Run the Developer on this CLI and model, for example --dev codex:gpt-5.6-sol. |
--review cli[:model] | Run the Code Reviewer on this CLI and model, for example --review copilot. |
The CLI names are claude, codex, agy and copilot. You can also pass a Jira key such as PROJ-123 instead of a description.
Status and resume
crewco status lists your recent tasks. Give it a task id for the full picture: phase, lineup, rounds, which runs are going or finished, and the resume commands. crewco resume picks up an interrupted task from its saved state without asking for the lineup again.
crewco status
No tasks yet.

crewco status <task-id>
crewco resume <task-id>
Team and profile
crewco team show prints the lineup the project will use. crewco profile show prints the saved project profile, and crewco profile refresh detects it again from the repo.
crewco team show (trimmed)
{
  "roles": {
    "developer": { "cli": "claude", "model": "sonnet", "effort": "medium", "permissions": "skip" },
    "tester":    { "cli": "claude", "model": "opus",   "effort": "medium", "permissions": "safe" },
    ...
  },
  "loop": { "maxRounds": 3, "fixThreshold": "major" }
}
Doctor
crewco doctor prints one block per CLI. Add --cli codex to check just one. It exits with an error if any CLI is not ready, which is normal when you only use some of the four.
crewco doctor (first two CLIs)
claude: ok
  installed: true  version: 2.1.0 (Claude Code)
  config_dir: ~/.claude (writable: true)
  network: true (reached api.anthropic.com:443)
  logged_in: true (you@example.com)
codex: ok
  installed: true  version: codex-cli 0.162.1
  config_dir: ~/.codex (writable: true)
  network: true (reached api.openai.com:443)
  logged_in: true ()
Start the UI
crewco ui                 # http://127.0.0.1:4287
crewco ui --port 5000     # another port
crewco ui --no-open       # don't open the browser
The app only listens on 127.0.0.1. The link crewco ui opens carries the sign-in for that tab and is never written to disk, so keep the tab open if you want to jump between tasks without signing in again.
Start at login
crewco service install     # start the app automatically at login
crewco service uninstall   # remove it
This registers the app with launchd on macOS, a systemd user unit on Linux, or Task Scheduler on Windows. Running crewco ui while it is already up is safe: it points you at the running one instead of starting a second.
Use the plugin
The plugin adds CrewCo commands inside Claude Code, Codex CLI, Copilot CLI and Antigravity, so you can run a task without leaving the CLI. Install it from the setup wizard (step 3), or from the web UI later. The CLI you are typing in becomes the Team Lead.
| Command | What it does |
|---|---|
/crewco:new-task | Run a new task through the crew. Takes the same flags as crewco run. |
/crewco:design | Produce a UI/UX design spec only, without implementing it. |
/crewco:test | Have the Tester write and run tests for a scenario. Reports pass or fail, makes no code fixes. |
/crewco:review | Have the Code Reviewer review a git branch. Read-only. |
/crewco:status | Show recent tasks, or the full status of one. |
/crewco:resume | Resume an interrupted task without asking the lineup again. |
/crewco:team | Show or change the lineup, for example “reviewer on codex, high effort”. |
/crewco:profile | Show, refresh or edit the project profile. |
/crewco:doctor | Check that every CLI in the lineup is installed, reachable and logged in. |
/crewco:open | Open a task, or the app, in your browser if crewco ui is running. |
Project files
In each project, CrewCo keeps plain files in .crewco/. You can read them, diff them and commit the shared ones.
| Path | What it holds | Commit it? |
|---|---|---|
.crewco/team.json | The team lineup: CLI, model, effort and permissions per role, the round limit, and workspace mode. | Yes |
.crewco/project.json | The project profile: package manager and commands. | Yes |
.crewco/project.md | Project notes handed to every role. | Yes |
.crewco/tasks/<task-id>/ | One folder per task, with its state and a runs/ folder for each agent. | No |
.crewco/wt/<task-id>/ | The task's git worktree, when worktree mode is on. | No |
Tasks use an isolated git worktree by default. To work directly in your checkout for every task, set "workspace": { "mode": "in-place" } in team.json, or pass --in-place for one task. Machine-wide settings live in ~/.crewco/config.json.
Troubleshooting
Start with crewco doctor or the Health page. It prints one line per problem, and none of them stop crewco ui from starting.
| What you see | What it means | Fix |
|---|---|---|
<cli> is not installed or not on PATH | CrewCo looked for that CLI's binary on your PATH and did not find it. | Install that CLI, or ignore it if you will not use it in a lineup. |
could not read <cli>'s version | The binary exists but its --version command failed or timed out. | Run <cli> --version yourself. Its error is the real cause. |
config dir isn't writable | CrewCo needs to read, and sometimes refresh, that CLI's login folder, but cannot. | Fix the folder's permissions, or run that CLI once so it creates its own folder. |
host sandbox blocks network | A connection to that CLI's API was refused or timed out. | In a container or restricted shell, allow outbound access to that host. Otherwise check your network, firewall or VPN. |
does not appear to be logged in | The CLI's own login check came back negative. | Run its login command (for example claude auth login or codex login) outside any sandbox, then run crewco doctor again. |
Still stuck? Open an issue on GitHub and include the output of crewco doctor.